Meet My Inspiration: The Missing Lokness

Hey there! It's Monday again, isn't it? Dang. Where did the weekend go? (Mine was 70% in the kitchen and 20% on the computer doing you guessed it... blog stuff!) My awesome friend Petra baked a mass of holiday cookies using her grandma's recipes, and I was lucky to get my hands on some! Have you started your holiday baking yet? (Send me some cookies, ok?) Guys, there's 10 days 'til Thanksgiving! Holy Moly! Last week, I posted a round up of 10 Chinese recipes for Thanksgiving for those who might still be looking to add something to their menu. Be sure to go check it out too, if you're looking for a non-traditional dish for Turkey Day!

I hope you've been following this blog series and enjoying getting to know more about the people who drive some of my favorite food blogs. If you're new to the series, welcome! Do stop by and check out the first post and the second post from the last couple weeks.

This week, I'm featuring my gal pal from the motherland. She's based in L.A and in the beautiful SoCal area. I've stumbled upon her blog The Missing Lokness some time earlier this year while I was doing some research on a classic Hong Kong dish. I was captivated by her luminous photos and have followed her blog ever since. Some of her recipes like Cantonese Style BBQ Pork Over Rice (叉燒飯), Creamed Corn with Pork Over Rice (粟米肉粒飯), and Baked Pork Chop with Fried Rice (焗豬扒飯) just scream home to me. I love that she has dedicated this blog to document her home cooking journey, and that she's not afraid to take on any new tastes! I hope you enjoy browsing her blog as much as I do!

Again, don’t forget to subscribe to my mailing list to get more of this blog series right into your inbox in the coming weeks! (Sign up form is on the sidebar or towards the bottom of the page if you’re on a smaller screen).

Now, here’s the behind the scenes chat with Lokness of The Missing Lokness!

1. What inspired you to start a food blog? And when did that start?
There are 2 reasons that mainly inspired me. First, a while after moving to the US, I started to miss all the great flavors from my hometown, Hong Kong. Items like egg waffle, baked pork chop rice, egg tarts, BBQ pork rice… I can find most of these foods in Los Angeles, but all require a 40-min drive. It is very inconvenient so I figure I should learn how to cook all these food for myself.

Second, Los Angeles is truly a melting pot when it comes to cultures and of course food. I am lucky enough to meet many people with vary different backgrounds and get to try their home cook dishes. When it comes to food, I am a daredevil. I love to try new things. The exposure to a variety of food in Los Angeles got me interested in exploring all kinds of dishes from around the world.

With that in mind, I started searching through recipes online and got into recipe testing. During the process, I was like “why not share all these delicious recipes that I learn?” That’s when The Missing Lokness was born on September in 2010.

2. What was the first post/recipe that you published on The Missing Lokness? (no peeking!)
Chicken a la King! A creamy and sweet white sauce with tender chickens is perfect over rice. I ordered that dish a lot when I lived in Hong Kong.

3. If you have to pick 5 words to describe your blog, what would they be?
Eat – YES, I love to eat! It is fun to share the amazing food that I have found and tried.

Cook – After tasting some unforgettable food, it is nice to recreate them at home.

Learn – I am a home cook, not a trained professional. When it comes to cooking, there are always new things to learn, like how to use microwave to make cake, how to easily remove seeds from pomegranate, or what kind of new food trend are exciting right now.

Live – I share a little bit of my life with my readers. Even through there are ups and downs in life, it is important to think positive and try to live happily everyday.

Explore – There are many places in the world that I would love to see. Of course, tasting local food from around the world is my ultimate dream. I enjoy sharing some of the best and worst food that I eat and see with my readers.

4. What's your weekend routine like? Food shopping in the morning? Cooking and shooting dishes at a certain time before the sun goes down?
I actually don’t cook much during the weekend. My husband, Bryan and I like a relaxing laid back weekend. We spend time hanging out and eating out with friends and families.

Food shopping is done during weekday mornings. It is the best time to go because the market is always quite and empty, which makes it super easy to navigate and get what I need without hassling. Occasionally, I like going to farmer’s market and get inspired by the fresh and seasonal ingredients. If I am making dessert, I usually do the baking in the afternoon hours. Baking and listening to music is the best thing to do ever! For savory food, I cook them in the evening. When Bryan gets home, we would shoot photos quickly and enjoy our meal while it is still hot.

5. Your photography is gorgeous! Mind to share what is in your camera bag?
Thank you so much! Bryan is the actual photographer. I cook, plate and set up, then Bryan shots. We work together as a team.

Bryan uses a Canon 5D mark III with EF 24-105mm f/4L lens. Since we mostly shoot in the evening, a flash is needed. He mainly uses one Canon 580EX II flash and a bounce reflector. For a camera geek like him, nothing is ever enough.

6. From the food perspective, what do you think the main differences are living in the U.S. vs Hong Kong?
In the US, there is a great blend of immigrates who bring in their cultures and food to the country. Immigrants crave food from their hometowns, and that drives the rich authentic food culture in the US. You can easily find all kind of amazing authentic food that you want. Mexican, Thai, Indian, Japanese, Chinese, Ethiopian, Italian, German and many more… All of which are easy to find and eat within the city limits.

On the other hand, you maybe able to find some of these foods in Hong Kong, but they may not be as authentic. There aren’t as many immigrants in and around Hong Kong, so there is no strong foundation to encourage authentic cuisine.

But I do have to say that the biggest thing I miss from Hong Kong is the street food. Street foods can be found everywhere. Things like fish balls, egg waffle, and baked buns. You can walk down the street, and easily grab a bite on the go. Here in LA, snacks or street foods is not that common. You always need to spend a good amount of travel time before you can find something good.

7. Your SoCal Guide is amazing - makes me want to visit! Is California where you'd like to be for a long time or is there somewhere else that you'd like to live someday?
Los Angeles is now my home. This is where Bryan grew up. We love how diverse Southern California is. One minute we can be sunbathing at the beach, and the next we can be skiing in the mountain. Other than earthquakes (and traffic), everything is perfect here!

8. What's the most challenging thing about food blogging?
I think every food blogger needs a bigger kitchen. When it comes to presenting, you need to have more props, plates and backgrounds to have the better results. Unfortunately, it gets really tricky for me, because I live in a tiny apartment. Where do I have space to store all that stuff, right? One day I dream of having a giant kitchen and pantry.

9. What would you eat as a treat to lighten up a rough day?
An easy treat would definitely be chocolate truffle! It is a pleasure to have a piece of sweet and bitter truffle that melts in your mouth. For a bigger treat, chocolate ice cream is the way to go. Creamy and cold! Even in winter (if you consider California’s winter to be a real “winter”), I still enjoy a cup of ice cream with my heater and blanket on. After all, they always say eating chocolate makes people happy.

10. We'll end with some food blogging love. Any blogs or bloggers who you admire yourself?
There are so many great bloggers out there. If I have to select a few I would say… Just One Cookbook is my go-to blog for Japanese recipes. It is authentic and easy to follow. Bonnie from Thirsty For Tea who is a tea enthusiast. She uses tea in most of her cooking. She is really creative who makes beautiful and adorable food (have a look, her dishes look so cute!). Also, Through Oana’s Lens is another favorite. During the world cup, Oana did a series of dishes from the cuisine of winning countries every day. How awesome and ingenious is that? Fellow Hong Kongers Amy from uTry.it and Monica from Playing with Flour both share amazing recipes as well.

And of course, Saucy Spatuala who shares my love of Hong Kong food. Whenever I see all those dishes (ie. Singapore-Style Rice Vermicelli and Iced Red Bean) on her blog, it reminds me of all those great food memories and makes me crave for a taste of home.

(Photo Credit: The Missing Lokness – Cantonese Style BBQ Pork Over Rice)

10 Favorite Chinese Recipes for Thanksgiving

Thanksgiving is less than 2 weeks away! If you're hosting a Thanksgiving dinner this year, I hope you're well on your way with the menu and getting the house all decked out and ready for the holiday season! I'm finalizing the menu while freaking out about how to comfortablely fit 6 people in our kitchen/living room/dining room - oh joy! NY-size apartments! But hey, it's all good. Can't wait to enjoy the day with my family! If you've landed on this post, you're either doing some finishing touches to your menu or you're looking for something non-traditional to add to the feast. You're at the right place, my friend! Take a look at these 10 Chinese recipes for Thanksgiving!

10 Favorite Chinese Recipes for Thanksgiving

1. This Sichuan Dry Fried Green Beans by The Woks of Life is a super simple and authentic dish that's packed with flavor!

2. A picture is worth a thousand words. You NEED to look at Appetite For China's Chinese Pork Ribs with Plum Preserves.

3. Maggie behinds Omnivore's Cookbook cranks out tons of authentic Chinese dishes, and this Stir-Fried Snow Peas and Water Chestnuts is one of them!

4. Rasa Malaysia is like an Asian food bible with over 800 recipes. 800! If you're not familiar with Bee's recipes, you've seriously been missing out! I love how this Happy Family has a little bit of everything in it. Happy dish for a happy Thanksgiving!

5. Garlic, check! Eggplant, check! My Chinese Eggplant with Spicy Garlic Sauce!

6. This Dry-fried Cauliflower, by China Sichuan Food, looks absolutely gorgeous (and spicy)!

7. I'm drooling over this Garlic Ginger Shrimp Stir-fry by Steamy Kitchen.

8. Sometimes I think Steph over at I am a Food Blog is not human. She's BRILLANT! Crispy Sriracha Honey Lime Tofu? I can almost taste the action-packed flavors!

9. HOLY BELLY!!! If this Cantonese Style Roast Pork Belly, by Lady and Pups, isn't reminding me of the delicious Hong Kong, I don't know what is!

10. As always Maryanne's photos make me want to eat my screen, including this Sesame Almond Noodles, just by looking at her perfect food photography!

Have a happy, merry, stuffed and drunken Thanksgiving everyone! (Insert glasses clinking toast sound here :D)

Coconut Monkey Bread

I'll be honest. I didn't grow up eating monkey bread. I didn't even know what monkey bread was until I moved to the States 14 years ago (has it really been that long??) The concept of monkey bread is BRILLIANT. It makes total sense with a clever name and it tastes heavenly. One of my favorite Hong Kong style buns is the Coconut Roll (椰絲包) and not to be confused with the Cocktail Bun (雞尾包). The Coconut Roll is pretty much an inside-out version of the Cocktail Bun, and it's not as sweet since you don't get the massive filling inside. Like my mom, I love any sweet things that are made with shredded coconut. So when I thought of making monkey bread, I just naturally jumped into the idea of whipping out a coconut version of it.

I've been eyeing on recipes that I can tweak to make this coconut monkey bread happen for a really long time. I'm also not much of a baker if you haven't noticed cause I like the freedom of not needing to measure everything when I cook. Sure, I can make a good loaf of banana bread on the weekends and some treats for the holiday but baking and I are not BFFs. Will we ever be? Probably not. That's why I have such admiration for Yossy Arefi's work. Oh my god, have you been to her blog Apt. 2B Baking Co.? It'll make you want to get into the kitchen and get your hands dirty. I found her amazing Chai Spiced Monkey Bread post on Food52, and adapted the recipe for my coconut monkey bread.

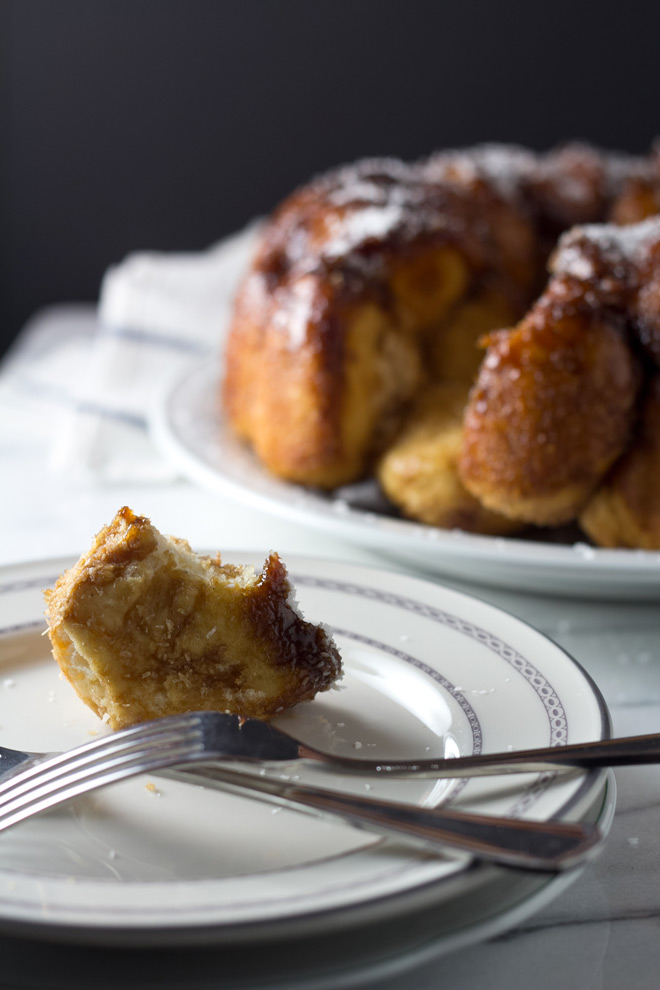
For someone who only bakes from scratch once in a blue moon, I was thrilled to get such an amazing turn out! (Much credit goes to Yossy's recipe!) I mean, how could I or anyone not love this gooey and caramelized goodness?

I know working with yeast may sound intimating but this is a winner all the way, and I'm glad you stopped by to share my love for coconut!

Don't have a bundt pan? Get a classic Nordic!

Coconut Monkey Bread

Prep time: 2 hours 30 mins  Cook time: 30 mins  Total time: 3 hours

You'll need:

  • Dough:
  • 4 tbsp unsalted soften butter, divided
  • 3/4 cup milk, 110°F
  • 1/3 water, 110°F
  • 1/4 cup sugar
  • 2 1/4 tsp active dry yeast, 1 envelope
  • 3 1/2 cup all-purpose flour
  • 2 tsp salt
  • 1 egg
  • Coconut Coating:
  • 6 tbsp unsalted butter, melted
  • 2/3 cup light brown sugar
  • 2/3 cup coconut sugar
  • 1/4 cup shredded coconut

Approach:

  1. Use 2 tbsp of unsalted butter to grease a 12-cup bundt pan. Make sure every crevice is covered.
  2. Combine the warm milk and water, sugar, and active dry yeast in a 2-cup measuring cup. Let it sit for 5 minutes while "proofing" and it starts to get bubbly.
  3. Combine flour and salt in a stand-mixer bowl fitting with a dough hook.
  4. When yeast is ready, turn stand-mixer on low (setting 2 on a KitchenAid) and stream in the yeast mixture. Add the remaining 2 tbsp soften butter and egg. Knead the dough for 7 minutes. Dough should be soft and sticky. If it seems too wet, add more flour a few tbsp at a time.
  5. Transfer dough in a large, oiled mixing bowl. Cover with a clean kitchen towel and let the dough rise 'til it has double its size, about 1 hour.
  6. While you're waiting for the dough to do its magic, prepare the coconut coating by combining brown sugar, coconut sugar, and shredded coconut together in a bowl.
  7. When the 1 hour is up and dough is finished from rising, transfer it to a floured surface and pat it into a 8" by 8" square. Use a pizza cutter to cut the dough into 36 pieces (6 strips each way).
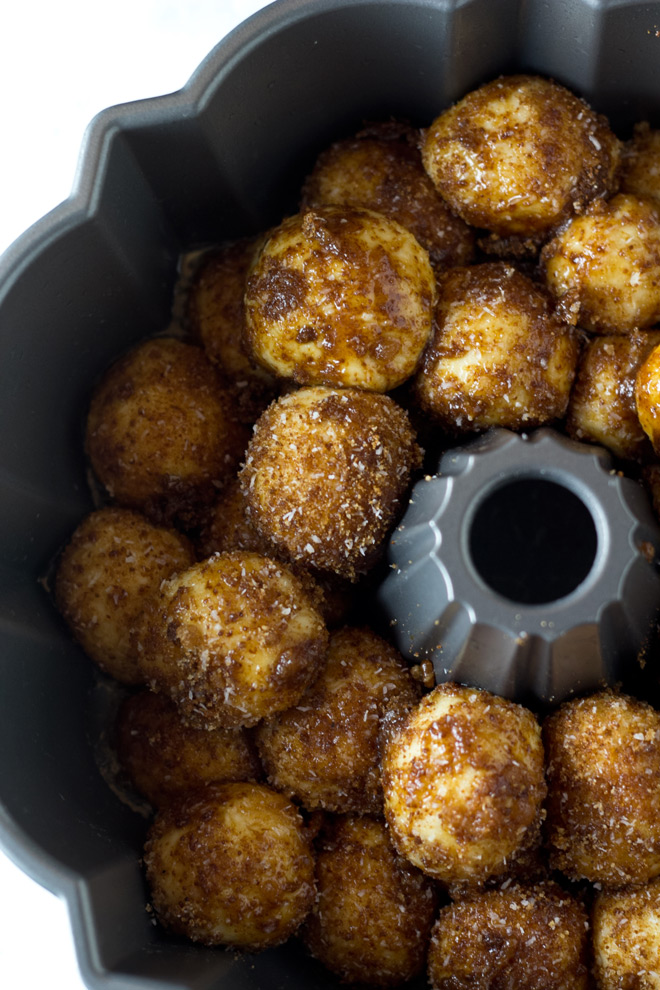
  8. Roll each dough piece into a ball. Dip in the melted butter, then the coconut coating. Place each ball one of top of the other in the buttered bundt pan.
  9. After all the dough pieces are placed into the pan, cover it with a kitchen towel. Let it sit for 1 hour. The dough will rise 1 to 2 inches, and closer to the rim of the pan.
  10. Preheat oven to 350°F. Bake the monkey bread for 25-30 minutes until the top has turned golden brown and the sugar is bubbling around the edges.
  11. Let it cool for 5 minutes before placing a plate on top, then flipping it over. Let it cool for another 5 minutes before serving.

Meet My Inspiration: RecipeTin Eats

Welcome back to the "Meet My Inspiration" blog series! If you're just joining us, be sure to stop by the first post from last Monday to check out the Q&A with one of the very talented bloggers behind The Woks of Life! This week, I bring you a very likable food blogger from Sydney, Australia! She's the creator of the amazing RecipeTin app, the person behind some of the widely shared recipes on Pinterest like Cinnamon French Toast Sticks, Baked Spinach Ricotta Rotolo, and Cheese and Garlic Crack Bread. She thrives for making food that is fresh, creative, and easy for everyone to cook. When I first came across Nagi's blog RecipeTin Eats, I immediately wanted to look at everything and didn't want to stop clicking next!

Nagi and I started chatting on social media some time ago, and I'm SO VERY thrilled that she had agreed to let me ask her a bunch of questions for this blog series! Make sure you stop by the Blogger Resources section on her blog - there're some really really great tips from monetizing your blog to understanding ad networks.

Before I leave you off with the Q&A, don't forget to subscribe to my mailing list to get more of this blog series right into your inbox in the coming weeks! (Sign up form is on the sidebar or towards the bottom of the page if you’re on a smaller screen).

Now, here’s the behind the scenes chat with Nagi of RecipeTin Eats!

1. What inspired you to start a food blog? Does the RecipeTin app has anything to do with it?
Starting a food blog was inevitable for me. I was born into a food obsessed family. When we aren’t cooking or eating, we are either talking about food, arguing about food or planning our next meal. I was also born with a natural desire to share, inspire and teach. In my former life I worked in corporate finance, and much of my job involved explaining complication transactions to boards and executives, investors, banks and my team. So though food blogging couldn’t be more wildly different to finance, there are some parallels - that is, communicating clearly and concisely, and sharing. Of course, the way I write on my blog is ALOT more enthusiastic than the board papers I used to write!

So starting a food bog after I left “corporate” was a natural step for me. The only thing that was holding me back was time. I didn’t want to start one until I had the time to invest in learning about blogging and food photography. Until May of this year, I had never even heard of Wordpress, thought a widget was a toy for kids and only took happy snaps of food with my iPhone!

RecipeTin app had nothing to do with my decision to start a food blog. I created the app before I started my food blog, so for consistency of branding purposes I chose to use the same name for my food blog.

2. Tell us more about the RecipeTin app! Do you have a tech background?
Not at all! I used to work in corporate finance, and I was IT Help Desks’ most frequent customer!!

RecipeTin app is a recipe storage app for iPhones and iPads. It’s unique because it’s actually more like a document storage app which allows you to add recipes without typing them in, whether it’s from a blog, in a magazine, cookbook, or even handwritten recipes. Especially now that I blog, RecipeTin app has been invaluable. I was at the hairdresser the other day and saw a recipe for molten lava cakes. So I snapped photos of it and stored them in RecipeTin App. Then I had it on hand when I was at the supermarket to buy the ingredients, then again when I went to make it. I constantly get my mother to email me recipes and I can just add them into the app with a touch. It’s just so, so handy having all my recipes in a single place.

Also, I wanted all my recipes to be stored on the device, not dependent on internet connection. So many apps out there rely on internet connection to view recipes. There is barely any reception in my local supermarket!

3. What was the first post/recipe that you published on RecipeTin Eats? (no peeking!)
Eerm….guacamole??!! Jeez, I can’t remember! The last few months are a blur! Why are you asking me such tricky questions??

4. You post something new almost everyday! What does your cooking day like?
I know, I’m insane! Well, the reason is because 90% of the time, I post what I cook on a day to day basis (so that’s 3+ posting opportunities each day!) and also because I am still learning food photography I want to practice as much as I can!

You are going to think I am mad….but most of the time, my cooking/photography days start at 5.30 / 6am and finish by 8 - 9.30 am. Because I am a morning person and also because I love morning light and as it's heading into summer here in Sydney, the sun is too high by 10am to get the “scrape of light” that I love to get in my food photos.

However, when I am cooking dinner things that don’t keep well or are best eaten immediately, I cook mid to late afternoon and catch the late afternoon sun which I also love. But whenever possible, I like to cook in the morning - which is why so many of my meals are breakfasts, suitable for freezing or make ahead!!

5. What's in your camera bag that helps you create such amazing food shots?
Nothing that pros have! I have a hand-me-down Nikon D5000. I splurged $200 on a Nikon 35mm f/1.8G AF-S DX lens which is great for food photography because it lets you get up close and personal with the food with amazing sharpness and also doesn’t make plates and bowls look warped and distorted which is what always used to drive me mad with my iPhone. That’s my “technical" explanation - see, I told you I was still an amateur!

And though not in my camera bag, my "can't live without" food photography accessories are a piece of plywood I found on the street that I painted with leftover ceiling paint that I use as my main photo board, folded white cardboard and paper I used as reflectors, and a piece of cardboard I cut a hole out of and clip tissue paper across to use as my diffuser. The 3 things I can’t live without for my food photography!!

6. How different do you think the food blogging atmosphere is between Australia and the U.S.?
Completely incomparable. The blogging world in the US is gigantic compared to Australia and as a result, there is a lot more support and sense of community. I’ve made friends with a lot of US bloggers but only one Australian blogger. Not for lack of trying!

7. The "Guide to Ad Networks for Food Bloggers" in your blogging resources section is super useful! What would you suggestion to food bloggers just starting out if they're interested in hosting ads on their blog?
Start with Google Ad Sense! Because you can get started so quickly and you can help yourself to everything you need, plus there’s a lot of great tutorials and knowledge bases. You can play around with it and get an understanding of what all the ad terminologies mean, learn how to put the ads on your blog, how they appear, all the different sizes and different types of ads etc. Then once you have that groundwork under your belt, start applying to ad networks. Otherwise, it is just too much to get your head around.

8. Being raised in a Japanese household, did you grow up eating a lot of traditional dishes? Or was it pretty multi-cultural?
When I was growing up, my mother cooked a lot of traditional dishes. I was that kid at school who was ahead of the curve and didn’t even know it. She sent me to school with bento boxes and sushi and all I wanted was a ham sandwich! Now as an adult, all I want is for my mum to make me sushi and bento boxes!!

9. What's your absolute favorite thing to cook?
Just one? One thing? Why would you do this to me? That’s an impossible question to answer.

OK, well, I'm going to give a cheeky answer then. Cheese. I love cooking anything with cheese. I know, it's boring! But I can’t help it. I am yet to meet a cheese I don’t love.

10. We'll end with some food blogging love. Any blogs or bloggers who you admire yourself?
Oh, thank you for finishing with an easy question!

Kathleen from Hapa Nom Nom - She is just incredible. I want to make everything that she posts. I actually bought a candy thermometer after she posted an Apple Caramels recipe. She constantly surprises with unique and creative ideas, things I didn’t realise that I wanted to make!! (It’s kinda like shoe shopping. I didn’t realise I needed those tan strappy kitten heels until I saw them.) Today she posted homemade dog biscuits. I literally jumped up and down - my puppy needs me to make them!

Imma from Immaculate Bites - another unique blog with an emphasis on African recipes. I genuinely learn things - new techniques, new ingredients. Being a cuisine that I don’t know very well but uses many ingredients that I am familiar with, I truly take inspiration from her blog. Her flavours are sensational. Just by reading her recipes, I know that the seasoning and flavours are right up my alley.

And there’s this other blog which I really admire. One of the very first blogs I started following. You might have heard of it - Saucy Spatula? It’s one of those food blogs that you can trust for authenticity. In this day and age, it’s becoming harder and harder to find Asian recipes you can trust. It also has great fusion spins, but still keeping true to the authentic flavours, if you know what I mean? When it comes to fusion food, there is a “line”. And Saucy Spatula is always on the right side of that line! And the chick that runs it - she ain’t such a bad sort!! :)

(Photo Credit: RecipeTin Eats - Slow Cooker Shredded Beef Chili Con Carne)

Hong Kong Style French Toast

Helloooo Friday! Hope you guys had a good week, and have something awesome planned for the weekend! You know, I miss Hong Kong for many reasons and French toast sure is one of them. It's a typical item on the menu at cha chaan tengs and it is served all day but you'd really only get it for breakfast or afternoon tea which is around 3 to 4 p.m.

French toasts here in America is just not the same thing. The Hong Kong version is a simple tweak to the original that I think (oh I KNOW) most people would love it. I mean, we're talking about stuffing it with something delicious here! The original Hong Kong style French toast isn't something you would/should eat everyday though... butter, deep-fried, and syrup? Oh yea, it's a total guilty pleasure.

Since I can't get the kind of French toast that I love from a regular diner, I make them at home, my way! This is my take on how you'd eat French toast when you come have breakfast at my house. It might not an exact copycat of how a cha chaan teng would serve it but it's about the brilliant idea my friends (and a little healthier since it's not deep-fried)! Let's go over the simple ingredients real quick... sliced bread, butter, eggs, maple syrup, and peanut butter! Yep, PB is the secret ingredient. What's not to love about a PB sandwich dipped in eggs and pan-fried then drizzled with maple syrup?? Now that's what I call breakfast of champions!

I don't usually get sliced bread from Chinese bakeries but I happened to pass by one and since I was making Hong Kong style French toast, it just made sense. Use any kind of bread you'd like but maybe stay away from using the kinds that are too soft or too fresh, otherwise you'll end up having French toast that's a little too mushy. And peanut butter? I like the smooth kind, and Peanut Butter and Co. is a staple in my pantry (still need to make a trip to their sandwich shop at some point!)

Gosh. Is there more? I want another one!

Hong Kong style french toast

Prep time: 5 mins  Cook time: 6 mins  Total time: 11 mins

You'll need:

  • 2 slices of bread
  • 1 tbsp butter, divided
  • 2 tbsp peanut butter
  • 1 egg, beaten
  • maple syrup

Approach:

  1. Make a simple peanut butter sandwich by spreading a thin layer of butter on both slices of bread, then spread about 1 tbsp of peanut butter on each side.
  2. Heat a skillet with ½ tbsp of butter.
  3. Dip the sandwich in egg. Let it soak for 6 seconds each side and run the edges too.
  4. Cook each side for about 3 minutes, until golden brown.
  5. Plate and top with a thin slice of butter and drizzle with maple syrup.

Chicken and Broccoli Baked Rice Hong Kong Style

As a former British colony, Hong Kong cafes or Cha Chaan Tengs have adapted many western ingredients such as cheese, milk, spaghetti, and tomato sauce. That's really how many iconic Hong Kong dishes were born. (Remember that Spaghetti Bolognese I made a while back?) Well today, I'm sending your way another popular dish (made with own my twist) that's fairly common in the Hong Kongese diet. I've been wanting to make a Hong Kong style "baked rice" with cream sauce for a long time but couldn't get pass the idea that I'd have to use cream soup that comes in a can. Until, earlier this week, I discovered how to make it from scratch and decided that it is time to tackle what I though was complicated but turned out to be untrue!

I grew up eating what people of Hong Kong often refer to it as "baked rice" (焗飯) which is kind of like a casserole or a gratin. See, the rice doesn't actually get cooked in the oven like you think it would judging by the name. Lost in translation perhaps?? What it really consists of are simple: meat or seafood on a bed of rice or spaghetti, topped with either tomato sauce or cream sauce, and a layer of cheese on top. You pop it in the oven until the cheese has melted to golden brown. Not feeling plain white rice? Many places would let you substitute it with a simple egg fried rice. And that's what a Hong Kong style "baked rice" is all about!

On one hand, the baked pork chop with rice (焗豬扒飯) is probably the most well-known in the baked rice arena which my friend over at The Missing Lokness had posted a recipe if you're ever interested in making an iconic Hong Kong dish. While the baked pork chop with rice is made with tomatoes and tomato sauce, I'll be sharing with you another kind of baked rice dish today that is made with a cream sauce!

Say hello to this Chicken and Broccoli Baked Rice. Perfect to make for dinner for two! Remember earlier I said the cream sauce is actually really easy to make? Well, get some chicken stock, heavy cream, a dab of butter mixed with flour, and a little white wine in a sauce pan! And don't forget a dash of salt and pep!

Baked rice with cream sauce in Hong Kong is often served with a seafood medley but considering that seafood is not always available to everyone, I thought using chicken and broccoli would be the perfect substitute! And the best part about this dish? It can be versatile so you can ditch the rice and go with pasta if you like!

So go cream that sauce and melt some cheese for dinner!


Chicken and Broccoli Baked Rice Hong Kong Style

Prep time: 25 mins  Cook time: 10 mins  Total time: 35 mins

You'll need:

  • 1 tbsp extra virgin olive oil
  • 1 tsp minced garlic
  • 2 cups broccoli florets
  • ½ lb chicken breast, cut into bite-size pieces
  • ½ tbsp unsalted butter, melted
  • 2 cups of cooked white rice
  • 6 tbsp shredded mozzarella cheese
  • 1 tbsp dried basil
  • Sauce:
  • ½ cup chicken stock
  • ½ cup heavy cream
  • ¼ white wine
  • 1 tbsp unsalted butter, soften
  • 1½ tbsp flour
  • salt and pepper, to taste

Approach:

  1. Preheat oven to 450°F.
  2. In a sauce pan, add chicken stock, heavy cream, and white wine. Cook on medium heat until it starts to boil then turn the heat on low.
  3. Heat another sauce pan with 3 cups of water (for blanching the broccoli in the next steps).
  4. Mix butter and flour together to form a paste. Stir it into the sauce until the big lumps have melted. Add salt and pepper to taste.
  5. Leave sauce cooking on low for 10 minutes while it reduces and thickens.
  6. Blanch the broccoli for a few minutes, then drain.
  7. In a heated skillet, add olive oil and minced garlic. Cook until fragrant, about 10 seconds. Add chicken and cook for 4 minutes, then toss in broccoli and cook for another 6 minutes.
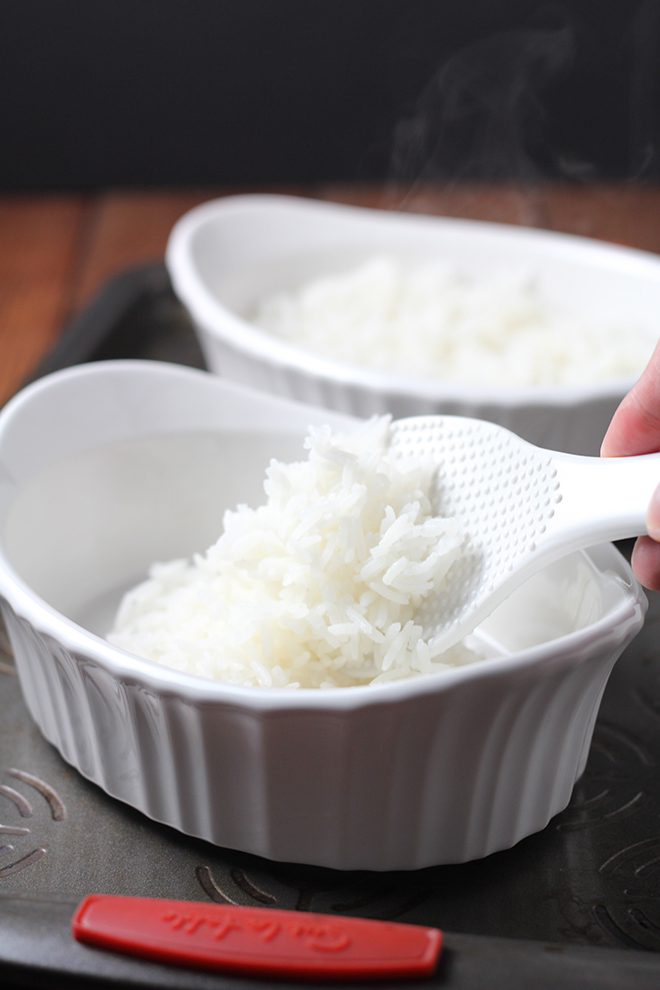
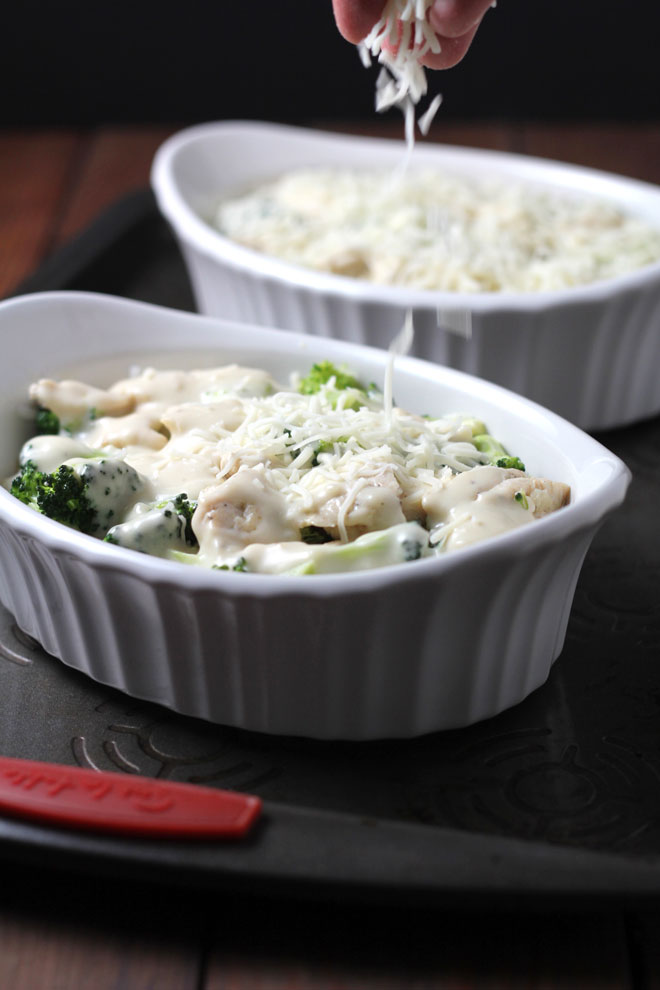
  8. To assemble each of the two dishes, brush the melted butter on the bottom of the gratin dish, add 1 cup of rice, half of the chicken and broccoli, 4 tbsp of cream sauce, and 3 tbsp of shredded mozzarella cheese.
  9. Put both gratin dishes on a baking sheet and bake for 10 minutes, until cheese has melted and turn golden brown.
  10. Garnish with a sprinkle of dried basil on top.

Meet My Inspiration: The Woks of Life

Happy Monday! Welcome to the first post of the new "Meet My Inspiration" blog series! I'm stoked to get this out of the gate with some great bloggers on board! I've been wanting to get to know more about the people behind some of my favorite food blogs, and I'd be selfish if I didn't share those stories with you! I feel so fortunate to receive such supportive response from the food bloggers who I admire everyday - you guys rock!

I'm a craftsman, and most food bloggers are too. I love coming across bloggers who value their work the same way. Blogging is not hard, and people blog just about anything. However, to be a decent blogger who can run the whole show (and can make a living out of it) is a marathon away from easy.

When I started this blog, I didn't know what I wanted to focus on. I would just browse around and pick up ideas here and there. I knew I wanted to cook, and wanted the blog to be a recipe food blog. After the first year of exploring, I discovered a blog that pretty much read my mind. I was immediately hooked onto everything that the family behind The Woks of Life was posting. I was so excited to come across such an amazing blog that covers Authentic Chinese cooking, I was doing the happy dance.

I'm so honored to be featuring The Woks of Life to kick-start this blog series. This family of four - Bill, Judy, Sarah, and Kaitlin - blogs between the U.S. and China/Beijing, and their passion for food is extraordinary. They post the most amazing recipes like Xiao Long Bao (小笼包) or shanghai soup dumplings, carrot ginger pork buns, two ways, Beijing's favorite Yangrou Chuan (羊肉串) or spicy Beijing lamb skewers, and Cantonese wonton noodle soup which I swear I can eat EVERYDAY.

Thank you Sarah over at The Woks of Life for contributing in this blog series, I could not ask for a better food blogger to kick-start this series with!

Make sure you subscribe to my mailing list to get more of this series right into your inbox in the coming weeks! (Sign up form is on the sidebar or towards the bottom of the page if you're on a smaller screen).

Now, here's the behind the scenes talk with Sarah!

1: It's great and unique to see that the whole family blogs on the same platform. Who particularly in the family started the idea of a food blog? Were Bill and Judy on board right away?
We’d actually been thinking about starting a food blog for a long time—it’s always been an idea that we’ve tossed around. There were just so many recipes that we all wanted to share, especially some of the more traditional Chinese stuff that Kaitlin and I wanted to learn how to make from our parents. We wanted to create a digital record of all the recipes we’ve enjoyed growing up, as well as new ones that we created.

But my sister and I were in school, battling midterms and coffee addiction, and my parents were working as well (they’re pretty coffee-addicted themselves, actually). Finally, I was out of school and between jobs, and I started looking into what it would take to get set up on Wordpress. Everyone was definitely on board from the get-go. It was all uphill (with a really steep learning curve) from there!

2: What was the first post/recipe that you guys published on The Woks of Life? (no peeking!)
It was a recipe called "Simple Spicy Pan-Fried Noodles." I remember it like it was yesterday… (cue dreamy harp music).

3: If you have to pick 5 words to describe your blog, what would they be?
Hmm. Probably, idiosyncratic (Shanghai Braised Pork Belly one day, Roasted Ratatouille Pasta the next…), anecdotal (not sure if this can be an adjective to describe a blog, but we do love our anecdotes), multi-cultural (too obvious?), diverse (four bloggers, one blog), and informative (lots of information for cooks who aren’t too familiar with Asian cooking!)

4. What's your weekend routine like? Food shopping in the morning? Cooking and shooting dishes at a certain time before the sun goes down?
Oh man. You pretty much hit it right on the head. We do indeed have a weekend routine. Usually Saturday is a relaxed day for recharging after a long week, and Sunday is our cooking day. We’re not always this organized, but when we’re really on the ball, we’ll strategize and announce what everyone plans to accomplish. If we don’t already have all the ingredients we need, we’ll go food shopping early, and then each of us will work on our respective dishes. I’m the crazed fool with the camera running around, yelling about how we’re losing daylight. I really haven’t figured out how to use the artificial lighting set-up we bought a few months ago. It’s still on my to-do list.

When we’re all together, Kaitlin participates in the craziness, but if she’s at school, she has her own routine, which is cooking between classes or at night.

5. I LOVE the name "The Woks of Life". I think it represents the blog really well. Just how did the name come about?
I thought of it literally JUST after I woke up one morning. It must have come to me in a dream...

6. From a food perspective, what are some pros and cons for living in the U.S. vs China/Beijing?
In the U.S., the quality of the beef is definitely better. It seems weird to mention that first, but you just can’t get a decent steak in Beijing. Most of the expensive stuff is imported from Australia, but it doesn’t taste quite the same. Asian cooking doesn’t usually involve cooking big hunks of meat anyway, so it’s more of an American complaint.

Though Beijing actually has a lot of variety (you can get Indian, Mexican, German, French, Vietnamese, Thai, etc.) since there are so many expats, it can be hard to find the perfect burrito or bowl of pasta there (if you don’t want to pay an arm and a leg). That’s why we cook a lot. The good thing about Beijing, though, is that you can find a lot of imported ingredients, so if you can cook it, you can have it.

Of course, there are so many pro’s about eating in China, I don’t even know where to start. The hot pot is amazing, noodles are EVERYWHERE, you can get Shanghai soup dumplings any time you want, there are high quality restaurants in every shopping mall (the food courts are so much better that they are in the US, and the top four floors of the mall could be dedicated solely to restaurants). Everyone cares about food and has pretty high standards. To top it all off, a lot of restaurants are cheap enough so you can have an amazing meal at a restaurant every day of the week if you want. It’s the best thing about living in China, in my humble, heavily biased opinion.

7: Who usually does the food photography? Mind to share what kind of camera and lenses are used in most of the recipe posts?
Kaitlin does the photography for her posts usually, and I do the rest. Kaitlin uses an old Canon Rebel T3i with a kit lens, and I’m using a Nikon D3200. I used to use the kit lens as well, but a few months ago, I bought a 35 mm f/1.8 lens, and I LOVE it for food photography. A lot of people use a 55mm lens, but it’s double the price, and I don’t think the focal length is ideal for my kitchen, where I don’t have a lot of room to stand really far back from the food.

8. What're the most challenging things about food blogging?
I would probably say it's all the administrative stuff that goes along with blogging. Maintaining a relatively strict posting schedule (we’re usually posting every other day), keeping up with social media, and making sure the site is running smoothly and is optimized for search and site speed. It’s a full-time job, so luckily the work is divided amongst the four of us.

9: What would you eat as a treat to lighten up a rough day?
Too many choices to name. Right now, I’m feeling rice and beans. And carnitas. And guacamole.

Or a big bowl of noodle soup. I could always go for that.

10. We'll end with some food blogging love. Any blogs or bloggers who you admire yourself?
My obsession with food blogging started with Pioneer Woman, a long time ago. I also really admire Lady and Pups, for her unique, brilliant recipes and gorgeous photography. Food Opera, which is a blog written by two sisters, is also great. It has a familial spirit similar to The Woks of Life.

Half Baked Harvest is amazing, and Mimi Thorisson’s Blog Manger is a great escape from your life if you don’t happen to be living in the verdant French countryside at the moment. I also met Maggie from Omnivore’s Cookbook in Beijing, and we had dinner and talked blogging. She’s awesome!

Of course, we love Saucy Spatula for the Asian inspiration. Your Hong Kong Style Curry Beef Brisket looks incredible—I think I mentioned this when I was geeking out in the comments, but it was what I’d order every time we stopped at Noodletown in NYC Chinatown, so it brings back memories.

(Photo Credit: The Woks of Life Lanzhou Beef Noodle Soup)

Ginger Spiced Applesauce

When life hands you 10 pounds of apples, you make applesauce. Well, they weren't just handed to me, I picked them at an orchard!

Some friends and I went to Wright's Farm last weekend and spent the day at the orchard picking apples, barbecuing, and just enjoying the outdoors. It was our first time going there which is a 2-hour car ride from NYC and we had a great time! I liked that the pick-your-own apples is only $10 a person and that includes a bag for your apples (unlike many orchards which often charge by admission and the apples you picked by weight). After purchasing your $10 bag which fills about 10 pounds of apples, you then drive into the orchard in your own car. There's plenty of space to park and get yourselves settled in if you're grilling or picnicking. Another reason why Wright's Farm is great? You can bring your dog! That's almost unheard of if you have tried going apple picking with your four-legged friend! It was so much fun and I'll definitely go back.

I think making fresh applesauce is almost mandatory after you've gone apple picking (along with pies and turnovers, etc..) I like my applesauce chilled, tart, and spiced! This time, I threw in some grated fresh ginger. Yep. It's definitely not the norm when making applesauce but I went with it anyway. And it turned out to be fantastic!

Oh another thing I threw in that's not so common? Star anise 八角! Just two little guys to make it a little more flavorful!

Nom! Now go eat some apples. That'll keep the doctors away I supposed.


GINGER SPICED APPLESAUCE

Prep time: 10 mins  Cook time: 15 mins  Total time: 25 mins

You'll need:

  • 3 pounds gala apples, cored, peeled, and and cut into eighths
  • ½ cup water (or apple juice/ cider if you like)
  • 2 tbsp lemon juice
  • 1½ tbsp freshly grated ginger
  • 2 cinnamon sticks
  • 1 tsp ground cloves
  • 2 whole star anise
  • sugar, to taste

Approach:

  1. Wash, peel, and cut apples into eighths. Place them into a pot.
  2. Add the rest of the ingredients. Cook on low-medium heat for 15 minutes.
  3. Gently mash the bigger chucks with a wire potato masher to create a smoother texture of your liking.

Notes:

This applesauce recipe has not been cooked with any added sugar. If you do not like applesauce that's tart, please add sugar tablespoons at a time and adjust to your liking.

Chinese Inspired Baked Potato Wedges

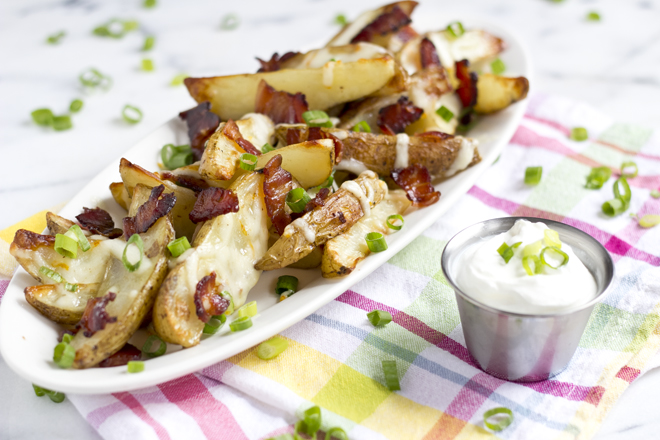
Potato might just be my favorite starch. I can totally eat it for dinner everyday because it can be cooked in so many different ways! What sparked me to make these Chinese Inspired Baked Potato Wedges was simply an instagram photo of some potato wedges someone took. That picture lit my fire, and I was on a mission to bring you some potato wedges baked with Chinese bacon, muenster cheese, and scallion!

On a side note, you know where I first tried oven-baked potatoes? WENDY'S. I remember when I was a kid, my dad would bring me to Wendy's once in a while, and I'd get the cheese and broccoli baked potato (if I wasn't already tired of their waffle fires with cheese sauce!) Wait. For those of you who grew up in America. Did the Wendy's here ever served waffle fries? Well, I loved them so freaking much, I still remember paying the person behind the counter at Wendy's $16 HK dollars for an order of waffle fries.

Potatoes rule!

These are Chinese bacon, or lap yuk 臘肉 in Cantonese. You can find them in most Asian/Chinese supermarkets. They're mostly air-cured with soy sauce and spices. I bought some that came in vacuum sealed packages. Sometimes you can spot them being hung unpackaged next to the Chinese sausages at the store. In many recipes or packaging, it would call for soaking the bacon for a few hours before cooking. However, for this Chinese Inspired Baked Potato Wedges recipe, I decided to skip the soaking step because I didn't think it was necessary since it'd need to be crisped in the oven anyway.

And why muenster cheese? Because why the heck not!? Try it next time when you make a grilled cheese. You won't be disappointed!

Potato wedges all lined up, ready to be baked!

Toss them with Chinese bacon, muenster cheese, and scallion. Then load it all up on an oven-proofed serving plate, and pop the whole thing in the oven for an additional 5 minutes until the cheese has melted.

VOILÀ! There you have it! Dunk them in a side of sour cream for some satisfying bites!

Chinese Inspired Baked Potato Wedges

You'll need:

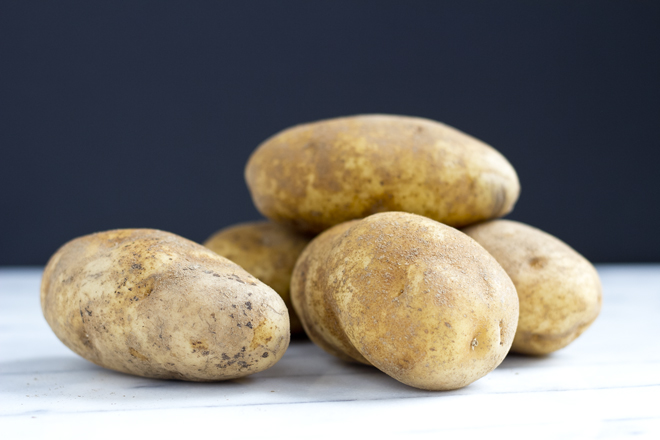
  • 3 medium Idaho potatoes, scrubbed
  • 2 deli slices of muenster cheese
  • ¼ cup sliced Chinese bacon
  • ¼ cup chopped scallion (about 2 stalks)
  • 2 tsp garlic powder
  • 2 tsp salt, divided
  • ½ tsp black pepper
  • some extra virgin olive oil

Approach:

  1. Preheat oven to 425°F.
  2. Line a 9"x13" baking sheet with tinfoil, coat the lined pan with 1 tablespoon of extra virgin with olive oil.
  3. Julienne the muenster cheese into very fine strips. Then slice the Chinese bacon, and chop the scallion. Set all aside.
  4. Cut each potato in half lengthwise, then cut each half into 4 wedges that are about the same size. You'll have a total of 8 long wedges from each potato.
  5. Place the potato wedges in a medium mixing bowl, add 2 tablespoons of extra virgin with olive oil, 2 teaspoons of garlic powder, 1 teaspoon of salt, ½ teaspoon of black pepper. Toss it all together until potato wedges are coated.
  6. Line them up on the baking sheet with skin side down. Bake for 10 minutes. Then bake each cut side for 15 minutes, until golden brown.
  7. In a large mixing bowl, toss the potato wedges, Chinese bacon, muenster cheese, and scallion together with 1 tsp of salt. Then load it all up on an oven-proofed serving plate. Pop the whole thing in the oven for an additional 5 minutes until the cheese has melted.
  8. Serve hot with a side of sour cream.

Ginger Sriracha Chicken Wings (薑汁雞翼)

When I was younger and still living in Hong Kong, my whole family would get together about once a month at my house to have something called a dai sik wui which is pretty much like a potluck turned giant feast. It's always someone's birthday or graduation, an aunt or uncle returning from the UK for vacation or just because it's summer and everyone is itchy for summery food and playing mahjong indoors with the air con blasting. Amongst all the goodies on the table, sometimes I'd spot a dish of Coca-Cola chicken wings. Yes. That's chicken wings cooked with Coca-Cola.

For the longest time, I thought only Cantonese and people from Hong Kong would make this odd-sounding dish. Then after some browsing around, I learned that Coca-Cola chicken wings are actually quite common in mainland China, as well as other Asian counties where Coke is the king of all soda pop.

In the process of coming up with a recipe that reminds me of my family's potluck, I thought I'd do something different here. So instead of using Coca-Cola, I turned to my favorite kind of ginger ale by Bruce Cost (the jasmine flavor is incredible by the way), and made some ginger sriracha chicken wings with a mass of minced ginger, ginger ale, sriracha, and a touch of ginger juice by The Ginger People!

The best part about these wings? They are cooked in the oven rather than braised like you would for the typical Coca-Cola wings. The dry heat from the oven does it's magic to make them less fatty, and it just produces "snackier" wings without the guilt of frying!

Once they've cooked 'til golden brown, garnish with sesame seeds and chopped scallion.

Got a grill? You know what to do!

Ginger Sriracha Chicken Wings (薑汁雞翼)

Prep time: 8 hours 10 mins  Cook time: 40 mins  Total time: 8 hours 50 mins

You'll need:

  • 2 lbs chicken wings (mid sections if preferred)
  • 4 tbsp finely chopped fresh ginger
  • 2 tbsp ginger juice by The Ginger People
  • 1 tbsp sriracha
  • 2 tsp salt
  • ½ tsp sesame oil
  • ¼ tsp garlic powder
  • ¼ white pepper powder
  • 6oz (half bottle) original ginger ale by Bruce Cost
  • Garnish:
  • 2 stalks scallions, chopped
  • 1 tbsp Sesame seeds

Approach:

  1. Peel, then chop fresh ginger finely using a food processor. Remove ginger and place it in a medium mixing bowl. Add ginger juice, sriracha, salt, sesame oil, garlic powder, white pepper powder, and mix well. Then stir in ginger ale. Add chicken wings to the mix and give it a stir. Cover with plastic wrap and let it marinate in the fridge overnight.
  2. Preheat oven to 425°F. Line a half sheet pan with tin foil, then place a cooling rack on top, brush with butter or canola oil lightly.
  3. Place chicken wings on the rack and make sure they don't overlap.
  4. Bake each side of the wings at 425°F for 15 minutes (total of 30 mins). Then adjust the temperature to 475°F, and bake for an additional 10 minutes, until golden brown.
  5. Let the wings rest for 5 minutes, then garnish with sesame seeds and chopped scallion.

Notes:

Ginger juice by The Ginger People
Original ginger ale by Bruce Cost
Classic Nonstick Jellyroll Pans and Cooling Grid, Set of 3, by Sur La Table®

Steamed Egg Custard (臘腸蒸水蛋)

If you ask my mom today, she would probably agree that I was once a very picky eater. And not only I was picky, I was always the last one to finish at the dinner table. I was a fussy kid who didn't like much of anything. And now I blog about food? Who would have thought?! Since I only liked a handful of things at the dinner table growing up, steamed egg custard (蒸水蛋) and I bonded like how American kids fell in love with mac & cheese. A plate of hot steamed egg custard fresh out of the wok with soy sauce pour all over on top. It's a simple comfort home cooking I know many Cantonese and Hong Kongers can relate to. Taking a spoonful out of the soft egg custard immediately creates a dent where soy sauce would rush in and fill the hollow space.

Steamed egg custard is one those dishes that reminds me of home as soon as I put the silky and savory bite in my mouth. While there are a few different versions of steamed egg custard, this is how I like to enjoy mine - with crunchy Chinese sausage bits!

The dish is usually made plain with just eggs and water. It can also be made with with baby shrimp or ground pork, and even sliced preserved eggs (皮蛋) which never looks appetizing. However the custard is made, it's commonly served with a thin layer of soy sauce on top, and garnished with a sprinkle of chopped scallion.

Here's what I did with the Chinese sausage. I chopped it into small chunks then I threw them into a food processor for a few seconds.

You then toss them on a hot pan for a minute or so, and you'll get these crispy sausage bits. A lot like bacon bits that you put on a salad but 1,000 times better!

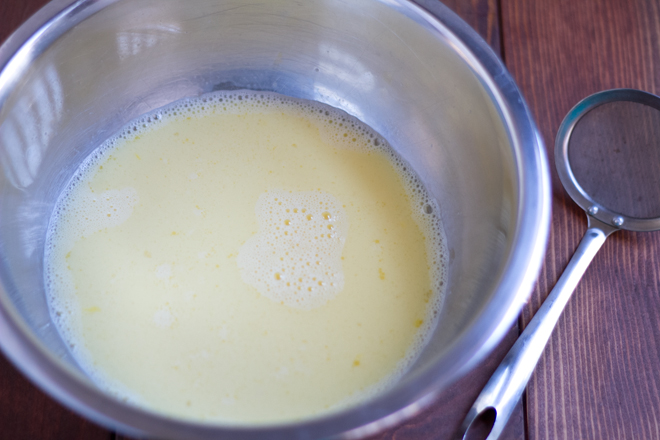
Next, the eggs. Like I mentioned earlier, steamed egg custard is usually made with just water which is good. What makes creamier and better custard is milk. And low-fat milk would do just fine. After beating the eggs and mixing in with other ingredients, you should either strain it or use a small sieve to remove any outstanding foam or bubbles so the surface of the custard remains smooth when steaming.

Set up your steaming wok or pan on low heat and set the timer for 18 minutes. And note that the higher the heat, the less smooth your custard will turn out. So if it is your first time making steamed egg custard, keep an extra eye on the money and observe the magic of steaming!

It's very common that you'll see little honeycomb-like texture in your steamed egg custard. And you'd see more of it if the heat was on too high while steaming. While some people like their steamed egg custard perfect with no honeycomb-like texture at all, to me, a little bit of it is the imperfection I look forward to when I make steamed egg custard. It's part of what makes it airy and a bit fluffy.

What's your steamed egg custard story? How does your family prepare this classic Cantonese dish at home? Share with us in the comments below!

Steamed Egg Custard (臘腸蒸水蛋)

Prep time: 10 mins  Cook time: 20 mins  Total time: 30 mins

You'll need:

  • 4 large eggs
  • 1 cup low-fat milk
  • ¼ salt
  • 4 drops sesame oil
  • 1 Chinese sausage
  • 1 stalk scallion, chopped
  • 1 tbsp soy sauce

Approach:

  1. Prepare a small skillet over medium heat.
  2. Cut Chinese sausage into small chucks, then throw them into a food processor and process for a few seconds, until finely chopped.
  3. Add 2 drops of sesame oil into the hot pan, then add chopped sausage. Cook for about 1 minute until it becomes slightly crispy. Then set aside.
  4. In a medium mixing bowl, whisk together 4 eggs, plus 1 cup of milk, salt and 2 drops of sesame oil, until well-combined.
  5. Using a small sieve, fish out any outstanding foam on top and on the side.
  6. Next, set up your wok with a steaming rack with 1" of standing water. Place an empty dish, that holds at least 2 cups of liquid, in the middle on top of the rack. Carefully pour eggs into the dish. Turn the heat on low, and set the timer for 18 minutes.
  7. When it is done, egg custard should be springy to the touch, and a bit jiggly.
  8. Let it rest for 1 minute, then top with 1 tbsp of soy sauce, crispy sausage bits, and chopped scallion.
  9. Serve hot.

Notes:

For your reference, this is what a steaming rack looks like.

Eggs to milk ratio should be 1:1. 

Meatballs with Sweet Plum Sauce (蘇梅牛肉丸)

Happy (almost) birthday, America! You're turning 238 this year! Hope you guys are looking forward to the July 4th with amazing cookouts, good company, spectacular fireworks, and let's not forget the most important of all - celebration of freedom and democracy. While America might not paint a perfect picture for everyone, we, as residents of this great nation, are truly fortunate to be living freely and enjoying the beauty of democracy.

Every year around the fourth of July, I get a little sad which has nothing to do with America's birthday. And nobody should be crying at a birthday party filled with food and entertainment (unless you're scared of clowns). But on the same week as America celebrates its independence, my birth place of Hong Kong is fighting for its own democracy on the other side of the world. This year, 510,000 Hong Kong citizens showed up on the annual July 1st march to demonstrate their desire for full democracy, and showed their support for a true election in 2017 that the Chinese central government had promised when the city was returned from the hands of Great Britain. Can you imagine if 510,000 people took the streets of New York City? Look, I love Hong Kong and it'd forever be my home where my roots are. I believe Hong Kong is a very special place like no others. It's just a little unbearable to see it being threatened increasingly by the Chinese central government whose a true bully on this playing field.

Well, until Hong Kong has reached full democracy, I will always have a little tear in my heart during Fourth of July. You may say I'm a dreamer. But I'm not the only one.

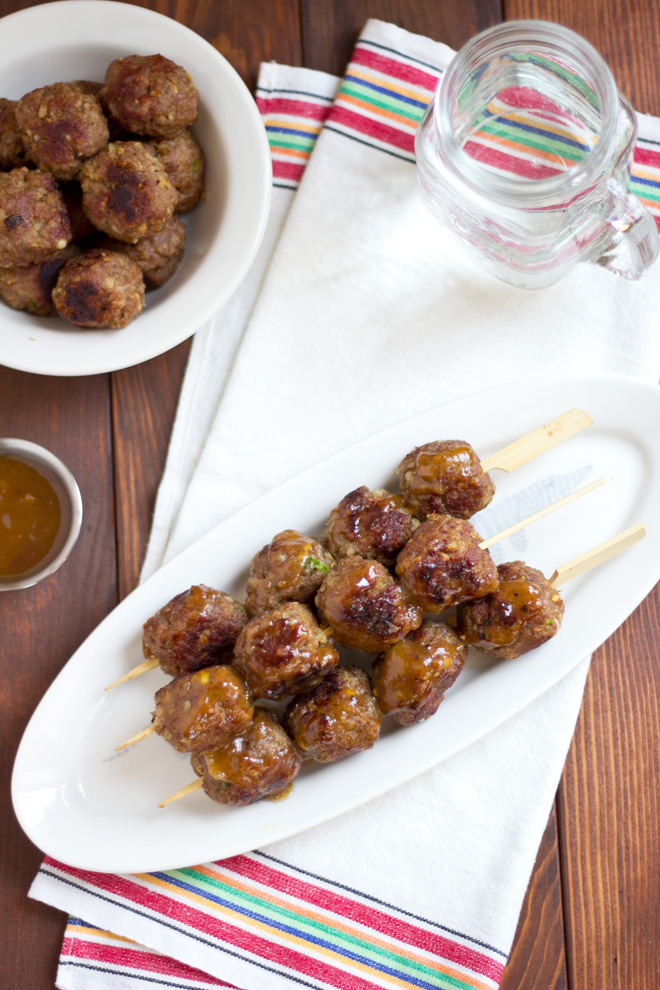
My feet, however, are standing on the soil of The United States of America. Therefore, I need to focus on what's also important to me - celebrating America's birthday! (YAY!) In this case, I brought meatballs to the party, y'all! While these are cooked on the stovetop, I highly recommend that you throw them over the grill at your Fourth of July cookout!

I love these bamboo skewers from Crate & Barrel - they're the best skewers! I got them from a Crate & Barrel outlet store in Chicago a while ago so they might not carry them anymore :( Shame!

Did you know that oyster sauce is great for seasoning beef? When I was trying to think of ingredients for these meatballs, I wanted something that's very flavorful, something more than just soy sauce. Oyster sauce seemed to be a great fit so I went testing my theory.

Not gonna lie. My first batch was way salty. I had forgotten the richness of oyster sauce, and went a little too heavy-handed. After adjusting the amount of it, the meatballs were golden, and ready to party! Meat is always good when it's got some char on it and these meatballs did not disappoint being cooked on the cast iron pan and not the grill. The hints of garlic and ginger came through, and the sweetness of the plum sauce was perfecto to go along with the savory beef.

Serve these meatballs with sweet plum sauce over rice, with buns, or even as lettuce wraps!

Have a spectacular Fourth, everyone!

MEATBALLS WITH SWEET PLUM SAUCE (蘇梅牛肉丸)

Prep time: 2 hrs 10 mins  Cook time: 15 mins  Total time: 2 hrs 25 mins

Serves: about 24, 1" meatballs

You'll need:

  • 1 lb ground beef, 80% lean
  • 2 tbsp garlic, minced
  • 2 tbsp ginger, minced
  • 2 tbsp scallion, finely chopped
  • ¾ tbsp oyster sauce
  • 1 tsp Worcestershire sauce
  • 1 cup panko breadcrumbs

Sauce:

  •  4 tbsp Chinese plum sauce
  • 2 tbsp warm water

Approach:

  1. Mix together ground beef, garlic, ginger, scallion, oyster sauce, and worcestershire sauce in a mixing bowl. Refrigerate, and let it marinate for 2 hours or up to overnight.
  2. Remove beef mixture from the fridge, and let it return to room temperature, about 10 minutes.
  3. While waiting, stir plum sauce together with water. Set aside.
  4. Mix panko breadcrumbs with the meat until well-combined.
  5. Heat a cast iron pan on medium-low, and add 2 tbsp of olive oil. Give the pan a twirl to spread the oil on the pan.
  6. Roll one-inch meatballs, and place them on the cast iron pan. Sear them for about 2 minutes, or until golden brown all around. Cook in batches if needed, and add more oil when needed.
  7. When all the meatballs are seared, put them on the skewers. Continue to cook on the cast iron on low heat for an additional 10-12 minutes. Rotate occasionally, and check the center temperature as you go.
  8. Let them cool for 1 minute, then top with sweet plum sauce.
  9. Serve immediately over rice, on a bun, or as lettuce wraps!

Caramelized Shallots

I respect Anthony Bourdain. A lot. If he's on a show, you bet I'd be watching it. I admire his passion and hard work that all circle around food and culture. So when he mentioned, in one of his books, what makes food at restaurants taste different (and better) than home cooked meals is the magic of caramelized shallots, I had to buy a whole sack of shallots the next day and experience what he's talking about.

I made two jars of caramelized shallots and kept them in the fridge. It was added to almost everything I cooked in the past few days. I topped some on a flatbread (with bacon), added some to sausages, and incorporated some in a beef curry. And I must say, I was not once tired of it. I wanted caramelized shallots in everything I put in my mouth!

To build more flavor, I also tossed in a bulk worth of minced garlic into the shallots. Because why the heck not? If you like to eat well but don't like garlic, then you're not doing it right, my friend! The aroma filled my tiny kitchen and apartment quickly when the shallots were getting sweet and garlicky on the cast iron pan.

I was in one very happy place.

If I were to give you advise when making caramelized shallots, I'd suggest not to dice the shallots too small, use lots of olive oil and some butter, don't worry about it getting a little burnt 'cause that's the good stuff (well, that's how I like it)! And use a cast iron pan because it simply does magic.

Caramelize it. Jar it. Get addicted to it!

Caramelized Shallots

Prep time: 10 mins  Cook time: 15 mins  Total time: 25 mins

Serves: 2, 14-oz jars

You'll need:

  • 20 shallots, diced
  • 1 bulk garlic, minced
  • About ½ cup extra virgin olive oil
  • 3 tbsp unsalted butter
  • salt and pepper to taste

Approach:

  1. In a cast iron pan on medium-low heat, add 3 tbsp of olive oil then add minced garlic. Cook for 1-2 minutes, until it becomes fragrant, then push it to the sides.
  2. Add butter to the pan, and add diced shallots in the center. Sauté until soft and golden, about 10 minutes. Incorporate the garlic into the shallots. Stir occasionally, and add olive oil every now and then to avoid shallots sticking to the pan. Sprinkle salt and pepper, to taste.

Black Pepper Beef Sliders

Here we go with the Cantonese-inspired sliders series #2! What did you think of the sweet and sour chicken sliders I posted a couple days ago? If you're reading this, I take it that you're interested to find out this next one I have for you as part of the sliders series? In that case, I'm seriously thrilled that you're here! And if you just happened to stumble upon this post, I'm glad that you're here too!

Do you rememeber a while ago I shared with you a recipe for Hong Kong style black pepper sauce? Well, today we're putting that to use. Black pepper sauce is quite common on the menu at tea restaurants and western-style restautants in Hong Kong. It's a sauce that usually goes along with grilled chicken or steak/beef, often served on a bed of white rice or spaghetti. I obviously grew up loving the dish so how could I not put that to use when I'm crafting some Cantonese-inspired sliders!?

And no, neither there is spaghetti in these sliders nor the buns were made out of rice. I'm not that crazy (but maybe I should be)? You be the judge, and let me know in the comments below! Beside black pepper sauce, Hong Kongers are quite fond of beef brisket which is what I used for these sliders. Even on a hot summer day, locals enjoy their beef brisket noodle soup 牛腩麵 (sometimes with a side of wontons) while taking shelter from the scorching hot weather with blasting air-con indoors. Beef brisket is also commonly enjoyed with curry (Curry Beef Brisket 咖喱牛腩) or with choy sum (菜遠牛腩).

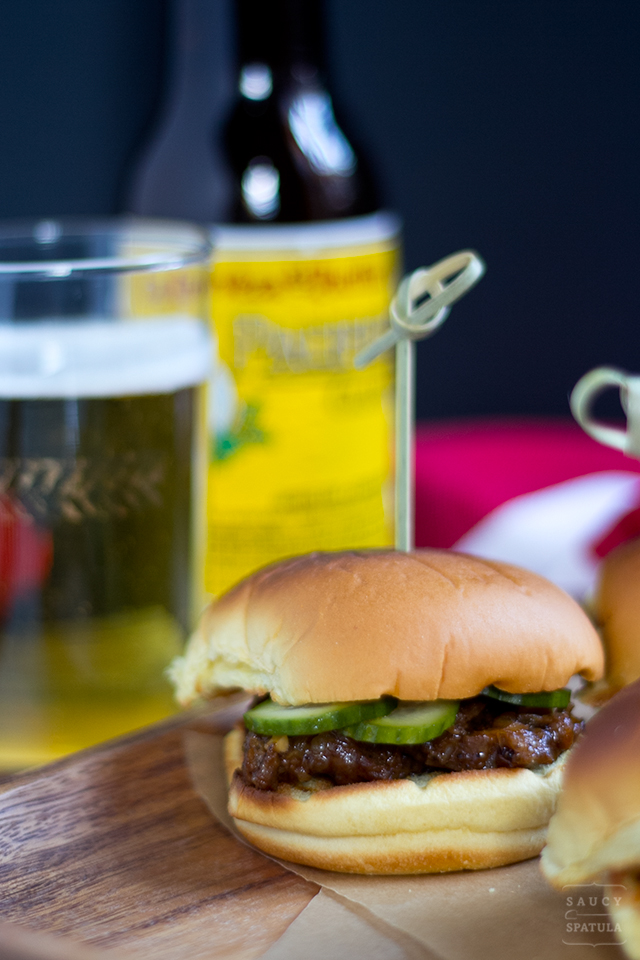
When I thought of making beef sliders, brisket just came to my mind like second nature since it's my favorite cut of beef. I think matching it with black pepper sauce and some homemade pickles was a wise choice, and the flavors came out just right!

So kick back, and enjoy a beer with these Black Pepper Beef Sliders!

Don't forget to check out Part 1 of the Cantonese-inspired sliders series:
 Sweet and Sour Chicken Sliders

Black Pepper Beef Sliders

Prep time: 5 hours 10 mins  Cook time: 30 mins  Total time: 5 hours 40 mins

Serves: 6

You'll need:

  • 6 Martin’s “sliced potato rolls”
  • 1 lb beef brisket
  • some homemade pickles
  • Marinate:
  • 1 tbsp olive oil
  • 1 tbsp garlic, minced
  • 3/4 cup yellow onion, finely chopped
  • 1 tbsp shaoxing (紹興) rice wine
  • 3 tbsp ketchup
  • 1/2 tbsp Worcestershire sauce
  • 1/4 cup soy sauce
  • 1/4 cup water
  • 1/2 tbsp freshly ground black pepper
  • 1 tsp sugar

Approach:

  1. Cut beef brisket into 2″ strips, then arrange them in a baking dish or toss them in a large ziplock bag.
  2. Combine marinate ingredients.
  3. Pour 2/3 of it into the baking dish or ziplock bag with the brisket, and give it a quick stir. Refrigerate for 5-6 hours, and give it another stir mid-way through.
  4. minutes before you’re ready to cook the brisket, remove it from the fridge, and let it sit and return to room temperature.
  5. Using a sauté pan on medium-high heat, cook the brisket for 10 minutes with all of its marinate. Then, cover with lid and simmer for another 20 minutes. Taste test the tenderness of the meat from time to time. In my experience, the longer you cook a brisket, the more tender it gets.
  6. Remove brisket from the pan, leaving the sauce. Let the meat rest for a few minutes on the cutting board before slicing.
  7. Pour the rest (1/3) of the marinate into the pan, let it simmer until the onion has soften and the sauce has thickened.
  8. Toast 6 buns in the toaster oven (butter lightly if you like).
  9. To assemble, take slices of brisket, top with sauce and then some pickles.
  10. Serve immediately (like now!)

Sweet and Sour Chicken Sliders

Helloooo summer! What have you done so far to celebrate the return of summer? Have you jumped into the water yet? Gone on any road trips? Had any picnics at the park with friends? Speaking of picnics, I've got an idea for you the next time you're needing to make something to bring to a picnic. For the next couple weeks, I'll be rolling out four Cantonese-inspired sliders recipes. I'm taking inspiration from some classic Cantonese dishes and turning them into a bao form! Are you ready to find out more about the first one in the series?

If you liked my sweet and sour pork (咕嚕肉) last time, you'll love these sweet and sour chicken sliders even more! Why? Because it‘s made with fried chicken wings! Yes... you heard it correctly. There's something so satisfying about fried chicken wings. Agree? It's the super crispy and crunchy skin that keeps winning every single time. I used my go-to fried chicken recipe (heavily adapted from Kenji's), and was again blown away by the result. Thank you Kenji! After frying the wings, I let them cool down for a few minutes before deboning them. Give them a rough chop on the cutting board and now they're almost ready to go on the bun.

To complete the full sweet and sour chicken experience, how can we forget the pineapple, bell peppers, and homemade sweet and sour sauce?

Voilà.

Take a bite of this classic Cantonese dish with a twist. And don't forget to come back later this week for the Cantonese-inspired sliders series no.2!

Sweet and Sour Chicken Sliders

Prep time: 15 mins  Cook time: 40 mins  Total time: 55 mins

Serves: 6

You'll need:

Approach:

  1. Slice pineapple and bell peppers. Make sweet and sour sauce. Set aside.
  2. Fry chicken wings by following the direction on my fried chicken recipe. After frying, let chicken cool down for a few minutes then debone and chop up roughly.
  3. Toast 6 buns in the toaster oven (butter lightly if you like).
  4. Toss the chopped up fried chicken along with sliced bell peppers in a medium mixing bowl. Drizzle with sweet and sour sauce, and combine well.
  5. To assemble, lay pineapple ring on each bun, and top with sweet and sour fried chicken.
  6. Serve immediately.

Kenji's Crispy Crunchy Fried Chicken

I know you love fried chicken. You know you love fried chicken. Deep frying anything at home can be a pain in the butt, and handling boiling hot oil can be intimidating. So if you are ever going for the task of frying up some chicken at home, might as well do it the right way to make sure what ends up on your plate will be truly rewarding – crispy and crunchy on the outside and juicy on the inside! And here's how you do it. I do have to say, Kenji from Serious Eats really taught me everything about deep frying chicken which involves a lot of science that I was sucked into reading. I appreciate so much of how far he had gotten in finding out the best way to fry chicken, and sharing the knowledge with the world. Therefore, 95% of the credit of the recipe goes to Kenji (I just heavily adapted it to my liking). What his recipe produces is a thin crackling skin that's super crispy. With that being the goal, here are the steps to follow:

1) Pre-treat the chicken. Why? Because fatty chicken skin simply will not stick to the batter. But what do you treat it with exactly? WRITE THIS DOWN. Corn starch + salt + baking powder. After coating all the pieces, you let them air-dry for about 20 minutes.

2. Mix some batter just before you're ready to fry. If you've deep-fried things before, you know the batter requires flour. That's true. But it also requires corn starch. Too much flour will create too much gluten, and too much gluten means "tough or leathery crusts". On the other hand, too much corn starch will make a powdery coating, and creates little browning. Therefore, a 50/50 mix is what you're looking for. Now, we're not done just yet. To make a lighter, crispier, and crunchier coating, you need to add baking powder which will help with the browning as well. But don't go crazy on it, just a touch is needed.

3. The secret weapon. VODKA. What it does is pure magic (okay, maybe not quite magic since it's science that can be proofed). Alcohol limits gluten development while the battered chicken is swimming in hot oil. Secondly, by adding vodka, you're creating a "drier" batter which will aid with evaporation and dehydration tremendously when frying, resulting in a bubbly surface and a crunchier texture of the chicken.

Regular batter mixed purely with water forms gluten as it sits. This batter mixed with vodka limits gluten development so it's got a longer shelf life, which means you don't need to keep an eye on it every minute.

So there you have it. Perfect bubbly, crispy, crunchy fried chicken.

Thank you, Kenji!

Kenji's Crispy Crunchy Fried Chicken

Prep time: 35 mins  Cook time: 30 mins  Total time: 1 hour 5 mins

Serves: 20 wings

You'll need:

  • 5-6 cups canola oil (or peanut oil)
  • Pre-treatment:
  • 1 tsp salt
  • ¼ cup corn starch
  • ½ tsp baking powder
  • 2 lbs chicken wings, about 20 mid-section wings
  • Batter:
  • ½ cups corn starch
  • ½ cup all-purpose flour
  • ½ teaspoon baking powder
  • 1 tsp salt
  • ½ cup cold water
  • ½ cup vodka

Approach:

  1. Mix together the pre-treatment ingredients. Pat dry the chicken wings with paper towels then coat each piece with the pre-treatment mixture, shake off excess coating. Lay them on a wire rack, uncovered, and air-dry for about 20 minutes.
  2. When you're ready to fry, set up your deep-fry thermometer, preheat oil to 350°F in a wok, sauce pan, cast iron pan or Dutch oven.
  3. While waiting for the oil to heat up, get the batter ready by mixing the dry ingredients first, then whisk in water and vodka.
  4. Coat 4-5 wings with the batter at a time. Using a pair of chopsticks, lift each piece one at a time and gently shake off excess batter. Carefully lower it into the oil. Fry each batch for about 6 minutes until golden brown. Use another clean pair of chopsticks to remove chicken from the hot oil, and set them on a paper towel-lined plate to cool off.

Notes:

Recipe adapted from SeriousEats.

Homemade Pickles

Pickles are quite a staple at our household. We eat them with sandwiches or just something to snack on in between meals. Most of the time, I get store-bought dill pickles but once in a while, I like to make some homemade pickles that is quick and easy.

The technique of pickling is quite an art form that can be traced back thousands of years ago. Almost every culture have mastered their own kind of pickling. Koreans with their kimchi, Chinese with their salted mustard greens, Italians with their giardiniera, Scandinavian with their pickled herring, Middle Eastern with their mekhallel. Pickling sure was big before refrigeration was invented. While I'm fascinated by different kinds of pickling, sometimes I just crave for some simple, homemade pickles!

Coming from a Chinese Hakka background, pickling was a big part of the Hakka cuisine because Hakkas were always finding ways to preserve food as they used to travel for long distances. Then as farmers, Hakkas would save up their surplus food supplies by pickling. Some of the most common Hakka preserved foods are pickled mustard greens, preserved mustard greens, fermented black beans, red fermented tofu, salted radish, and of course soy sauce. My grandfather's favorite Hakka dish, Braised Pork Belly with Red Bean Curd (南乳燜猪肉), uses red fermented tofu.

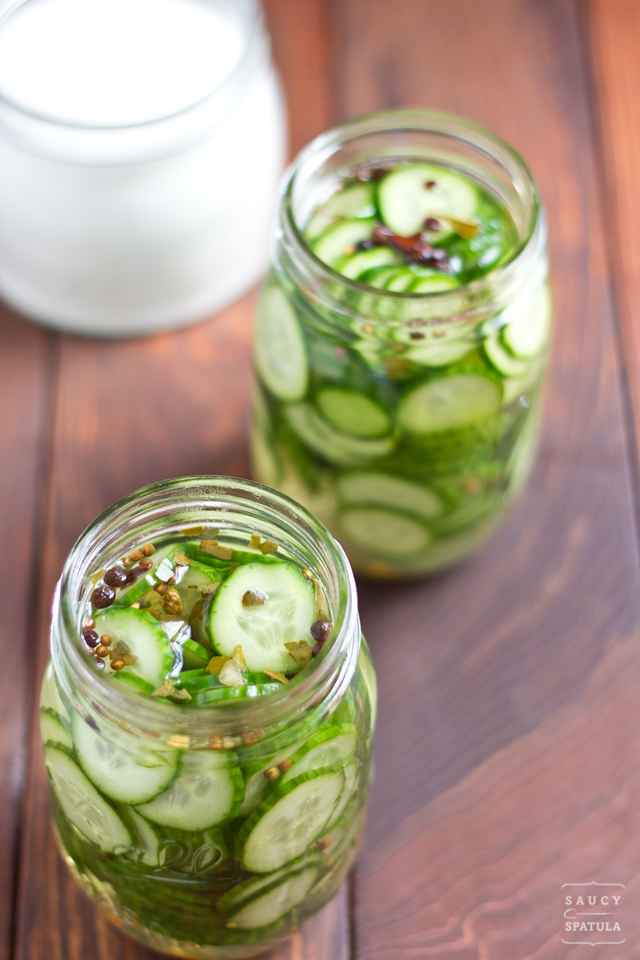
Okay, back to pickles. Let's start with some kirby cucumbers, shall we?

Using a Mandoline Slicer, choose the thickness to your liking, and slice away! (Please watch your fingers. Pleeeeease!)

I usually let the pickles sit in the fridge for 2 days before serving. It will retain its texture and flavor for up to a week.

Homemade Pickles

Prep time: 2 days 10 mins  Cook time: 5 mins  Total time: 2 days 15 mins

Serves: 2, 16-oz jars

You'll need:

  • 6 kirby cucumbers, about 2 cups
  • 1½ cups water
  • 1½ cups white vinegar (or apple cider vinegar)
  • ½ cup + 2 tbsp granulated sugar
  • ½ tbsp salt
  • 1 tbsp Mccormick mixed pickling spice

Approach:

  1. Using a mandoline slicer, carefully slice all 6 cucumbers.
  2. Place sliced cucumbers into jars, filling almost to the top.
  3. Pour the rest of the ingredients in a small sauce pan, heat on the stove over low heat until sugar and salt has completely melted, then turn off heat immediately. Let vinegar mixture cool completely.
  4. Using a ladle and a funnel (or a ladle with pour spout), fill the jars with the vinegar mixture.
  5. Refrigerate for at least 2 days before serving. Pickles will retain their texture and flavor for about a week.