Malaysian Steamed Cake - Mah Lai Goh (馬拉糕)

Here we go! I've been dying to make this post happen! Attempt after attempt, I've finally made a batch of Mah Lai Goh (馬拉糕) that I'm absolutely thrilled with (after gaining 5 pounds from eating all the failed cakes!) This dim sum classic is soft, light, spongy, and a tad sweet. I still can't believe it took me this long to try making it, and I'm just stoked that it turned out better than I anticipated.

Mah Lai Goh (馬拉糕) is also called Malay cake or Malaysian steamed cake. However, the cake wasn't originate in Malaysia. It's a Cantonese steamed cake that's often seen on the dim sum table. It's pretty much every kid's favorite at dim sum growing up because it's... cake. No child can turn down cake for breakfast on a Sunday morning when your whole family goes yum cha. So how did it get its name? I can't seem to find the absolute answer. Legend has it that Singaporeans with Malay descent are the ones who created Mah Lai Goh in the first place, then the cake was introduced to Canton (now known as Guangdong) and Hong Kong. This super moist cake get its tenderness from steaming instead of baking which uses dry heat. It's made with light brown sugar for its sweetness, and very little dairy as in only 4 tablespoons of butter. FOUR!

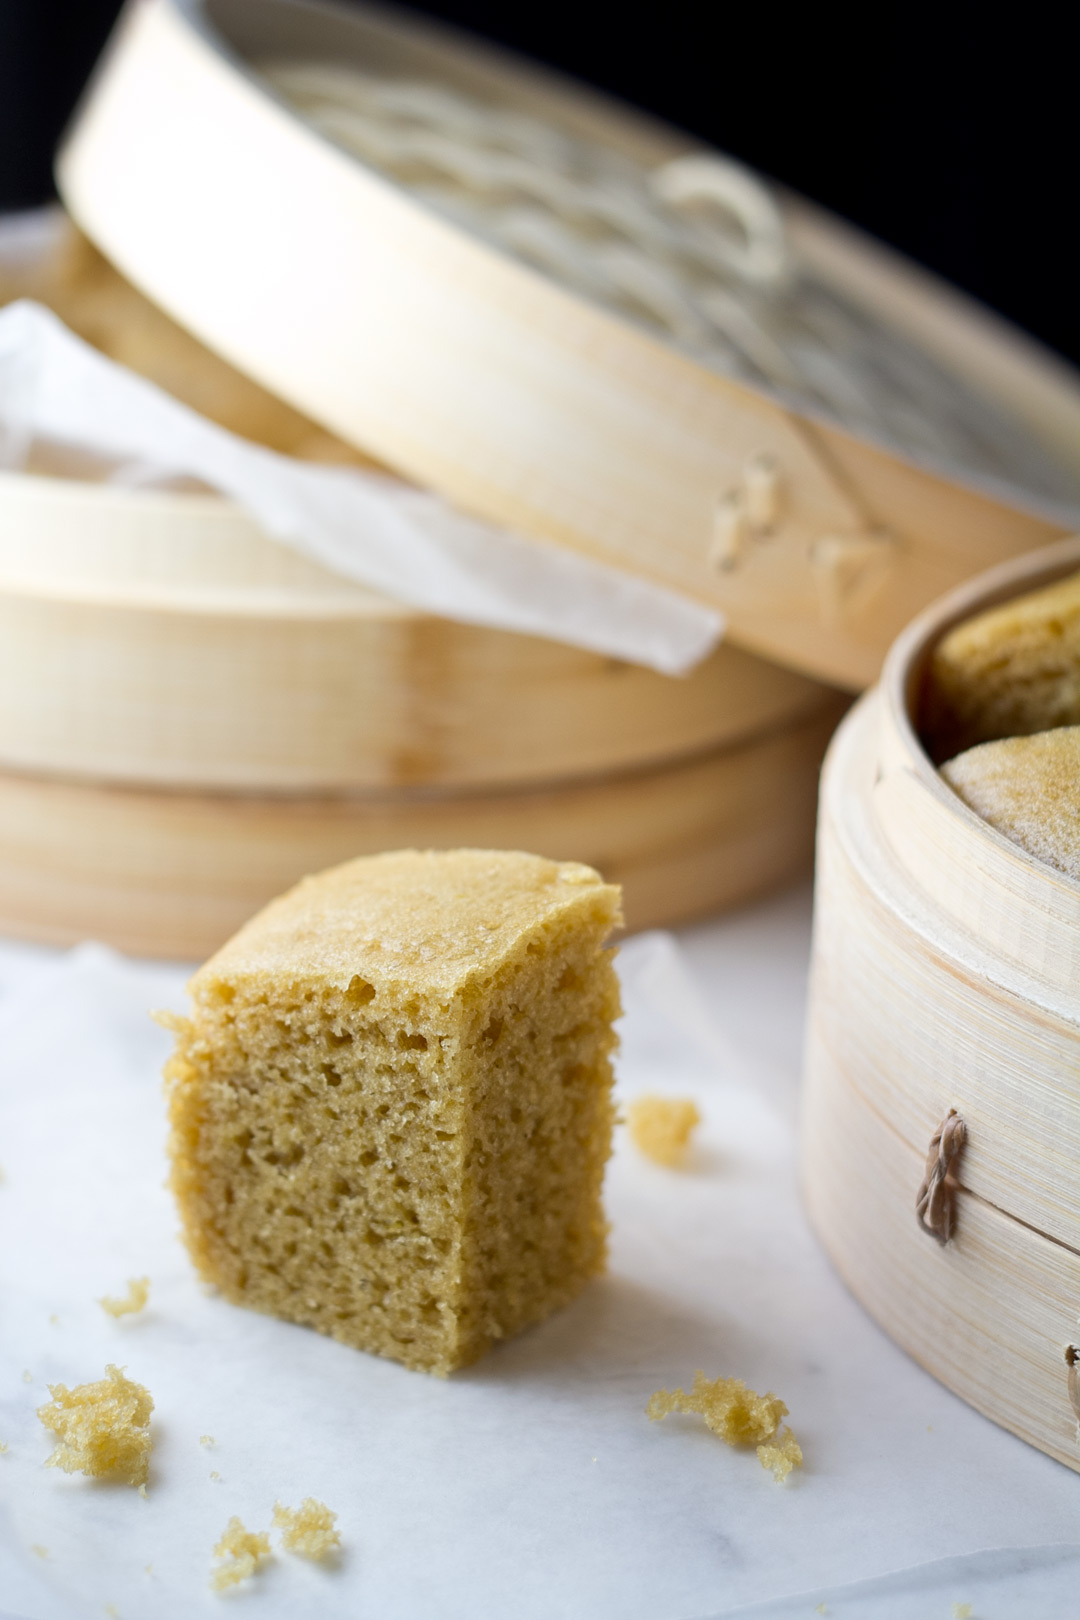
I swear pictures can't do this Mah Lai Goh justice of how amazingly tender this brown sugar cake is. When it's fresh out of the steamer, it smells incredible and the cake will just melt in your mouth. Part of what makes Mah Lai Goh so distinct from other cakes is the airiness and the texture (the little holes you see all over the cake).

Doesn't this look just like what you get at dim sum?!

Steaming

Now, let's go over steaming, and a little bit of "MacGyvering" when you don't have the proper equipment like a good size wok with a dome lid. It's totally possible but you just have to be a little bit creative. When you're steaming, you want to make sure the kitchenware you're using is big enough so that there's enough steam to go around inside the pot. And that there's enough space between the boiling water and the cake that's being steamed. You never want your cake touching the water because that'll just be boiling, not steaming. Think of double boiling, in a way. Also make sure there's enough water for the entire duration of the steaming process. If you see that it's running low, simply add more hot water to the pot or wok (never add cold water because that'll make a sudden change of cooking temperature).

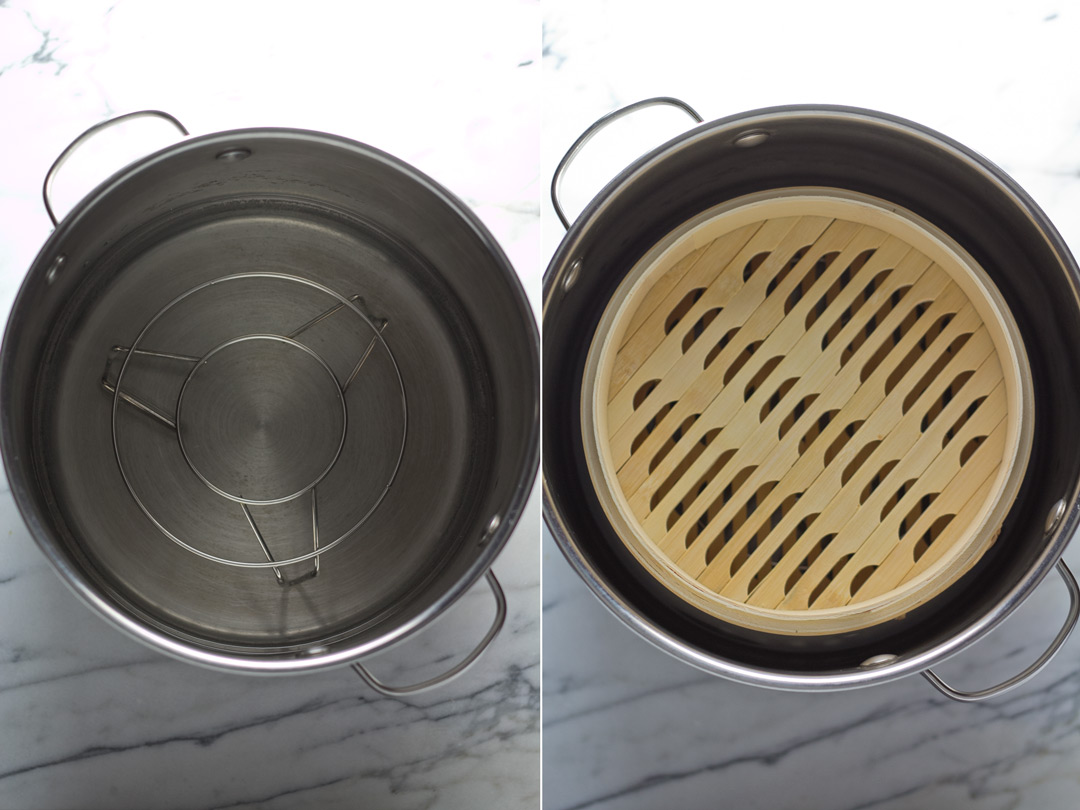
Here's my setup since I do not own a wok (I know, why don't I have a wok? How do I not have one? I'm honest don't even know).

I used a stockpot, a big one. I added a Chinese steaming rack on the very bottom, filled about 2" of water in the pot (fully covering the steaming rack), and set my bamboo steamers on top of that (that's two, 8-inch steamers stacked on top of each other).

Don't have either a steaming rack or bamboo steamers, then you can try using a heat-resistant bowl (place it upside down inside the stockpot) and a standard cake pan. Again, you want to make sure that the cake pan isn't touching the boiling water. Look around your kitchen and see if there's anything else that you think might work and give it a try.

Steaming cake might sound a little weird but it really is unbelievably scrumptious.

Try it!


Malaysian Steamed Cake - Mah Lai Goh (馬拉糕)

Prep time: 10 mins  Cook time: 30 mins  Total time: 40 mins  

Serves: 1, 8-inch cake

You'll need:

  • 1 cup all-purpose flour
  • 1 tsp baking soda
  • 1 tsp baking powder
  • 3 large eggs
  • 3/4 cup brown sugar
  • 7 tbsp coconut milk
  • 1/4 cup butter, melted
  • 1 tsp vanilla extract

Approach:

  1. Prepare your steamer by setting up the wok/stockpot filled with water, and get it boiling on high heat.
  2. Mix together flour, baking soda, and baking powder. Set aside.
  3. Line your bamboo steamer or cake pan with parchment paper.
  4. While the water is still reaching for the boiling point, beat eggs and brown sugar together in a stand mixer on low for 2 minutes (setting 4 on a KitchenAid).
  5. Add coconut milk, melted butter, and vanilla extract. Mix on low for another 1 minute.
  6. Add the dry ingredients to the wet, parts at a time. Mix on low until batter is well-combined, about 1-2 minutes.
  7. Pour the batter into the lined bamboo steamer or cake pan. Then carefully place inside the wok or stockpot. Turn the heat down to medium and steam for 30 minutes.
  8. Remove bamboo steamer or cake pan, and let it cool for at least 5 minutes before slicing.
  9. Serve warm.

Notes:

The cake can be refrigerated and re-steamed the next day, and it will stay fresh for up to 4 days.

Recipe adapted from Cake on the Brain.

Coconut Monkey Bread

I'll be honest. I didn't grow up eating monkey bread. I didn't even know what monkey bread was until I moved to the States 14 years ago (has it really been that long??) The concept of monkey bread is BRILLIANT. It makes total sense with a clever name and it tastes heavenly. One of my favorite Hong Kong style buns is the Coconut Roll (椰絲包) and not to be confused with the Cocktail Bun (雞尾包). The Coconut Roll is pretty much an inside-out version of the Cocktail Bun, and it's not as sweet since you don't get the massive filling inside. Like my mom, I love any sweet things that are made with shredded coconut. So when I thought of making monkey bread, I just naturally jumped into the idea of whipping out a coconut version of it.

I've been eyeing on recipes that I can tweak to make this coconut monkey bread happen for a really long time. I'm also not much of a baker if you haven't noticed cause I like the freedom of not needing to measure everything when I cook. Sure, I can make a good loaf of banana bread on the weekends and some treats for the holiday but baking and I are not BFFs. Will we ever be? Probably not. That's why I have such admiration for Yossy Arefi's work. Oh my god, have you been to her blog Apt. 2B Baking Co.? It'll make you want to get into the kitchen and get your hands dirty. I found her amazing Chai Spiced Monkey Bread post on Food52, and adapted the recipe for my coconut monkey bread.

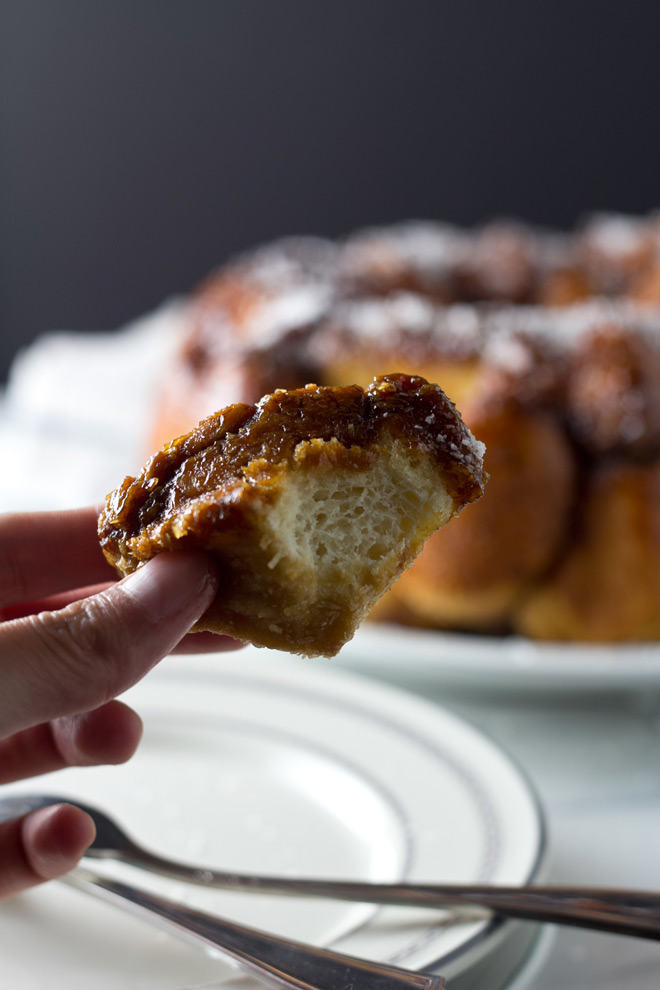
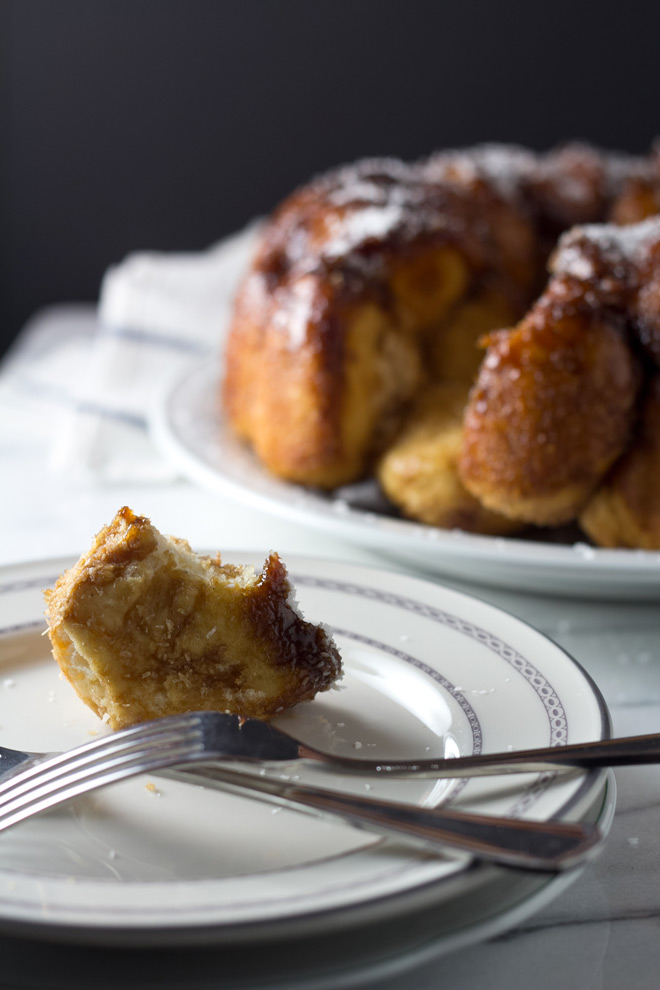
For someone who only bakes from scratch once in a blue moon, I was thrilled to get such an amazing turn out! (Much credit goes to Yossy's recipe!) I mean, how could I or anyone not love this gooey and caramelized goodness?

I know working with yeast may sound intimating but this is a winner all the way, and I'm glad you stopped by to share my love for coconut!

Don't have a bundt pan? Get a classic Nordic!

Coconut Monkey Bread

Prep time: 2 hours 30 mins  Cook time: 30 mins  Total time: 3 hours

You'll need:

  • Dough:
  • 4 tbsp unsalted soften butter, divided
  • 3/4 cup milk, 110°F
  • 1/3 water, 110°F
  • 1/4 cup sugar
  • 2 1/4 tsp active dry yeast, 1 envelope
  • 3 1/2 cup all-purpose flour
  • 2 tsp salt
  • 1 egg
  • Coconut Coating:
  • 6 tbsp unsalted butter, melted
  • 2/3 cup light brown sugar
  • 2/3 cup coconut sugar
  • 1/4 cup shredded coconut

Approach:

  1. Use 2 tbsp of unsalted butter to grease a 12-cup bundt pan. Make sure every crevice is covered.
  2. Combine the warm milk and water, sugar, and active dry yeast in a 2-cup measuring cup. Let it sit for 5 minutes while "proofing" and it starts to get bubbly.
  3. Combine flour and salt in a stand-mixer bowl fitting with a dough hook.
  4. When yeast is ready, turn stand-mixer on low (setting 2 on a KitchenAid) and stream in the yeast mixture. Add the remaining 2 tbsp soften butter and egg. Knead the dough for 7 minutes. Dough should be soft and sticky. If it seems too wet, add more flour a few tbsp at a time.
  5. Transfer dough in a large, oiled mixing bowl. Cover with a clean kitchen towel and let the dough rise 'til it has double its size, about 1 hour.
  6. While you're waiting for the dough to do its magic, prepare the coconut coating by combining brown sugar, coconut sugar, and shredded coconut together in a bowl.
  7. When the 1 hour is up and dough is finished from rising, transfer it to a floured surface and pat it into a 8" by 8" square. Use a pizza cutter to cut the dough into 36 pieces (6 strips each way).
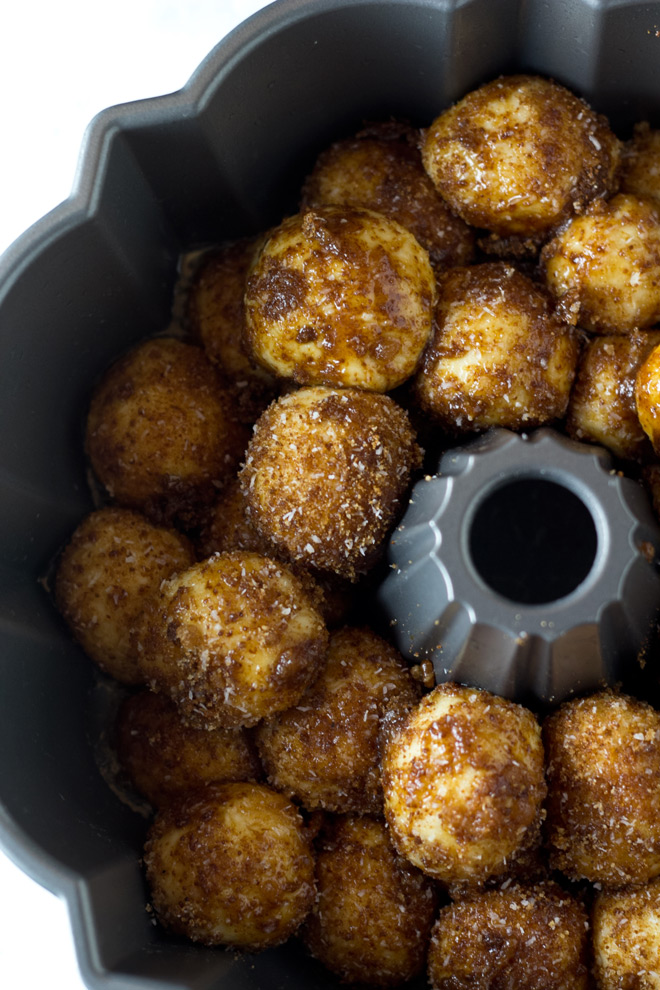
  8. Roll each dough piece into a ball. Dip in the melted butter, then the coconut coating. Place each ball one of top of the other in the buttered bundt pan.
  9. After all the dough pieces are placed into the pan, cover it with a kitchen towel. Let it sit for 1 hour. The dough will rise 1 to 2 inches, and closer to the rim of the pan.
  10. Preheat oven to 350°F. Bake the monkey bread for 25-30 minutes until the top has turned golden brown and the sugar is bubbling around the edges.
  11. Let it cool for 5 minutes before placing a plate on top, then flipping it over. Let it cool for another 5 minutes before serving.

Hong Kong Style French Toast

Helloooo Friday! Hope you guys had a good week, and have something awesome planned for the weekend! You know, I miss Hong Kong for many reasons and French toast sure is one of them. It's a typical item on the menu at cha chaan tengs and it is served all day but you'd really only get it for breakfast or afternoon tea which is around 3 to 4 p.m.

French toasts here in America is just not the same thing. The Hong Kong version is a simple tweak to the original that I think (oh I KNOW) most people would love it. I mean, we're talking about stuffing it with something delicious here! The original Hong Kong style French toast isn't something you would/should eat everyday though... butter, deep-fried, and syrup? Oh yea, it's a total guilty pleasure.

Since I can't get the kind of French toast that I love from a regular diner, I make them at home, my way! This is my take on how you'd eat French toast when you come have breakfast at my house. It might not an exact copycat of how a cha chaan teng would serve it but it's about the brilliant idea my friends (and a little healthier since it's not deep-fried)! Let's go over the simple ingredients real quick... sliced bread, butter, eggs, maple syrup, and peanut butter! Yep, PB is the secret ingredient. What's not to love about a PB sandwich dipped in eggs and pan-fried then drizzled with maple syrup?? Now that's what I call breakfast of champions!

I don't usually get sliced bread from Chinese bakeries but I happened to pass by one and since I was making Hong Kong style French toast, it just made sense. Use any kind of bread you'd like but maybe stay away from using the kinds that are too soft or too fresh, otherwise you'll end up having French toast that's a little too mushy. And peanut butter? I like the smooth kind, and Peanut Butter and Co. is a staple in my pantry (still need to make a trip to their sandwich shop at some point!)

Gosh. Is there more? I want another one!

Hong Kong style french toast

Prep time: 5 mins  Cook time: 6 mins  Total time: 11 mins

You'll need:

  • 2 slices of bread
  • 1 tbsp butter, divided
  • 2 tbsp peanut butter
  • 1 egg, beaten
  • maple syrup

Approach:

  1. Make a simple peanut butter sandwich by spreading a thin layer of butter on both slices of bread, then spread about 1 tbsp of peanut butter on each side.
  2. Heat a skillet with ½ tbsp of butter.
  3. Dip the sandwich in egg. Let it soak for 6 seconds each side and run the edges too.
  4. Cook each side for about 3 minutes, until golden brown.
  5. Plate and top with a thin slice of butter and drizzle with maple syrup.

Ginger Spiced Applesauce

When life hands you 10 pounds of apples, you make applesauce. Well, they weren't just handed to me, I picked them at an orchard!

Some friends and I went to Wright's Farm last weekend and spent the day at the orchard picking apples, barbecuing, and just enjoying the outdoors. It was our first time going there which is a 2-hour car ride from NYC and we had a great time! I liked that the pick-your-own apples is only $10 a person and that includes a bag for your apples (unlike many orchards which often charge by admission and the apples you picked by weight). After purchasing your $10 bag which fills about 10 pounds of apples, you then drive into the orchard in your own car. There's plenty of space to park and get yourselves settled in if you're grilling or picnicking. Another reason why Wright's Farm is great? You can bring your dog! That's almost unheard of if you have tried going apple picking with your four-legged friend! It was so much fun and I'll definitely go back.

I think making fresh applesauce is almost mandatory after you've gone apple picking (along with pies and turnovers, etc..) I like my applesauce chilled, tart, and spiced! This time, I threw in some grated fresh ginger. Yep. It's definitely not the norm when making applesauce but I went with it anyway. And it turned out to be fantastic!

Oh another thing I threw in that's not so common? Star anise 八角! Just two little guys to make it a little more flavorful!

Nom! Now go eat some apples. That'll keep the doctors away I supposed.


GINGER SPICED APPLESAUCE

Prep time: 10 mins  Cook time: 15 mins  Total time: 25 mins

You'll need:

  • 3 pounds gala apples, cored, peeled, and and cut into eighths
  • ½ cup water (or apple juice/ cider if you like)
  • 2 tbsp lemon juice
  • 1½ tbsp freshly grated ginger
  • 2 cinnamon sticks
  • 1 tsp ground cloves
  • 2 whole star anise
  • sugar, to taste

Approach:

  1. Wash, peel, and cut apples into eighths. Place them into a pot.
  2. Add the rest of the ingredients. Cook on low-medium heat for 15 minutes.
  3. Gently mash the bigger chucks with a wire potato masher to create a smoother texture of your liking.

Notes:

This applesauce recipe has not been cooked with any added sugar. If you do not like applesauce that's tart, please add sugar tablespoons at a time and adjust to your liking.

Iced Red Bean with Coconut Milk (椰汁紅豆冰)

Spring has finally arrived! In order to celebrate the return of warmth and the coming sweaty days, I decided to share with you an original Hong Kong summer dessert/drink - Iced Red Bean 紅豆冰 (with coconut milk). This is a drink that people usually don't make at home so you're in for a treat (no pun intended)! So if it's not made at home, then where do Hong Kongers go to get their Iced Red Bean?

Iced Red Bean was first created in a type of restaurants in Hong Kong known as Bing Sutt (冰室). The direct translation of the term is "ice room". Why "ice room" you may ask? Well, Hong Kong's climate is generally quite warm with summers that could be unbearable. Bing Sutts are places where people can pop in and out to get a cool drink in the 90°F summers (plus humidity)! So how do you know if you've walked into a Bing Sutt? Small tile floors, hanging fans, folding chairs, booth seatings are the characteristics of a typical Bing Sutt decor. Bing Sutts gained popularity in the 50's and 60's because they provided the working-class localized western meals at affordable prices, and they are mostly located in residential areas and neighborhoods making Bing Sutts great places for people of all social status to gather and to cool off! Bing Sutt eventually started serving food outside of their localized western menus to stay competitive with Cha Chaan Tengs (which I consider as the next generation of Bing Sutts). If you happen to pass by a Bing Sutt while visiting Hong Kong, I highly recommend that you pop in for a tea or coffee as there're not too many Bing Sutts left in the "kong" as real estate prices soar making mom-and-pop shops to fold one after another.

A traditional Ice Red Bean is made with three things: sweetened and cooked red beans, evaporated milk, and crushed ice. If you're not familiar with Asian or Chinese desserts, red or green beans are often made into sweets in various forms. Traditional Chinese pastries often use red bean paste as fillings, or an ABC (Air Batu Campur), which is a Malaysian dessert that is very popular in Southeast Asia, uses sweetened red beans on top of shaved ice. (Bee over at Rasa Malaysia has a Ice Kacang/ABC recipe for you if you're interested.) And you might also be wondering why evaporated milk? Evaporated milk is widely used in many Hong Kong style drinks and dessert. I think mainly it's because it's got a longer shelf life than regular milk, and it adds a certain flavor to tea and coffee. It could also because dairy is not consumed in most Hong Konger's daily diet (other than eggs), so regular milk is not very popular.

Besides the three key ingredients, I also added coconut milk which I was very happy with. The trickiest part of this whole operation is to get the ice crashed right. Even thought, I wasn't entirely happy with the consistency of the crushed ice my food processor was producing, I was happy that it was at least getting the job done (if that means processing the ice in batches, and scoop out any big stubborn pieces along the way). WELL. I guess that's why Ice Red Bean isn't usually made at home! It's easier for Hong Kongers to walk down the street from their apartments to get one rather than doing all the mumble jumble which no one ever has the time to.

So there you go. Treat yourself like a Hong Kong local on a hot summer day! (Want it to be more awesome? Top it with a scoop of vanilla ice-cream!)

Iced Red Bean with Coconut Milk (椰汁紅豆冰)

Prep time: 2 hrs 15 mins  Cook time: 5 mins  Total time: 2 hrs 20 mins

Serves: 4, 12oz-glass

You'll need:

  • ¾ cup red beans, raw
  • ½ cup plus 4 tbsp granulated sugar
  • ¾ water
  • 4 cups finely crushed ice (almost close to shaved ice)
  • 1½ cup coconut milk
  • 1½ cup evaporated milk

Approach:

  1. Cook raw red beans for an hour and a half until they become soft, and skin has started to fall apart from the beans. Keep enough water in the pot for at least 1" standing water on top for the entire duration of cooking the beans.*
  2. Drain, and return beans back to the pot. Add ¾ cup of water plus granulated sugar. Let sugar melt on very low heat for 20 minutes. Stir occasionally. Then pour beans on a baking sheet to cool completely, then stick the baking sheet in the freezer until the beans are chilled.**
  3. Mix coconut milk and evaporated milk together. Set aside.
  4. Using a food processor or blender, finely crush the ice.
  5. To assemble, fill ⅔ of the glass with chilled red beans, ⅓ of the glass with crushed ice, fill the glass with the milk mixture.
  6. (Top it with a scoop of vanilla ice-cream!)

Notes:

You may choose to soak the beans overnight, that would cut down on cooking time.

You may choose to pour cooked beans into a big mixing bowl, and let it sit in the fridge overnight.

Cheddar Pear Tart

This cheddar pear tart recipe is now one of my fall favorites. It's an apple pie alternative and a great party finger food. I originally saw a recipe for cheddar pear pie but remembering that my sister gave me some tartlet tins a while go, my light bulb then went on and decided to make tarts instead of a pie.

This baking session ended up taking me WAY longer than it needed to only because there were only five tartlet tins to use (kicking myself for not being prepared!). I didn't want to bake 5 tarts at a time but it was already too late to change my idea. And plan b, of going out to get more tins, was out of the question that day. I committed so I went for it.

After a few hours, there they were! :)

Cheddar Pear Tart

Servings: 50 tarts

You'll need:

Shells:

  • 4 3/4 cup all-purpose flour
  • 3 sticks unsalted butter
  • 3/4 cup powdered sugar
  • 3 eggs
  • 3 tsp vanilla extract
  • 1 1/2 tsp salt

Filling:

  • 6 bartlett pears
  • 2 tbsp cornstarch
  • 1/4 tsp salt

Topping:

  • 1 1/2 cup fine shredded cheddar cheese
  • 1 1/2 cup all-purpose flour
  • 3/4 cup sugar
  • 3/4 tsp salt
  • 1/4 cup unsalted butted, melted at room temp

Approach:

  1. Make the tart shells by combining flour, powdered sugar, and salt. Then add vanilla extract and butter and slowly whisk in the eggs. Form dough into a ball.
  2. Make the filling by chopping and dicing the pears, then mix in the cornstarch and salt. Set aside.
  3. For the topping, combine cheddar cheese, flour, sugar, and salt. Then mix in the melted butter. Stir to combine but don't over mix. It'll appear crumbly.
  4. Form dough into 1 inch balls (bigger or smaller, depends on the tin size)
  5. Cover each tin with dough by working from the middle then outwards. When you get to the top, slightly pitch the edge so it looks like an "A".
  6. Fill in the diced pears to the top, then add the topping, and sprinkle a little more cheddar cheese.
  7. Bake at 375°F for 15-17 minutes or until the top has turned brown.

Bon Appétit!