Chinese-inspired Jambalaya

A few months ago, I joined a Facebook group called Food Bloggers Central founded by the amazing Nagi of RecipeTin Eats and Megan of Culinary Hill. I was blown away by how supportive the bloggers are to one another. Food blogging is often a one-man team and having someone (or a group of like-minded people) who will have your back, when you're trying to figure out how to do the million things that's usually required to maintain a food blog, just helps a ton.

I had already befriended Nagi a while back before joining the group (I interviewed her just last year for my blog series Meet My Inspiration) So when she approached me about being a member of Food Bloggers Central, I immediately said yes.

Fast forward to last month, Nagi had initiated this project called Food Blog Hop. The idea is that each blogger who's interested in the project would be matched with two other bloggers, and we would basically cook each other's recipe.

Then maybe a week later, Nagi being her awesome ambitious self posted a spreedsheet of the big list of bloggers, and who each blogger was matched with. What a task! Bravo, Nagi! I quickly went down the list, and found my name next to Neli of Delicious Meets Healthy. I didn't know Neli before so I starting poking around her blog and spotted something I've been wanting to try - Jambalaya.

If you've been following my posts, you probably have noticed my growing love for Southern cuisine ever since I watched the first episode of A Chef's Life. I mean, I did go after Vivian's chicken and rice, and cooked it back to back for two weekends. Would I take a trip down to North Carolina and eat at Vivian Howard's restaurant, Chef & the Farmer? HECK YEAH, in a heartbeat I would. Did you know that A Chef's Life was just nominated for multiple James Beard Awards? I just love what Vivian is doing and the awesome stories that she's been sharing. It's so inspirational to me. My desire to learn about food and culture has been growing faster than I can keep up, and then when I saw Neli's jambalaya, my light bulb bursted into a shower of meat, vegetables, and rice (insert imagination).

Jambalaya reminds me a lot of Hong Kong style clay pot rice. Clay pot rice is such an iconic Hong Kong winter dish. When I was in the Kong 2 weeks ago, I was thrilled when Emily (who I met on Instagram and spent the day hiking the Dragon's Back with) suggested that we'd get clay pot rice for dinner in Yau Ma Tei.

And it was amazing.

Hong Kong style clay pot rice

I love the similarities between Jambalaya and clay pot rice. Both have meat and vegetables cooked in one pot, and it's so rich and savory, it will just shoot you to the moon and back.

So without having much knowledge about this iconic Southern dish, I went off to find out all kinds of things about the Jambalaya.

Jambalaya is a Louisianan dish that has a lot of French and Spanish influences, and it's made differently depending on the region you're in. Many debate over rather the jambalaya was evolved from the Spanish paella or French Jamalaia, or perhaps both given the region's cultural history with Spanish and French settlers in the 18th Century.

Jambalaya is a lovely and rich stew that has four main ingredients: meats, vegetables, stock, and rice. The most common version is probably the red jambalaya, also known as the Creole jambalaya which is referred to as "city food". Creole jambalaya is more popular near New Orleans, on the Eastern part of Louisiana. The other kind of jambalaya is the brown jambalaya, also known as Cajun jambalaya which is referred to as "country food". And Cajun jambalaya is commonly found in Western and Central Louisiana.

So how the heck do you tell between a Creole and a Cajun jambalaya? The main difference is the use of tomatoes in the Creole jambalaya. And Cajun jambalaya is known as brown jambalaya because of the natural camelization of sugar in meats and veggies in the browning process, and it later gets incorporated into the stock.

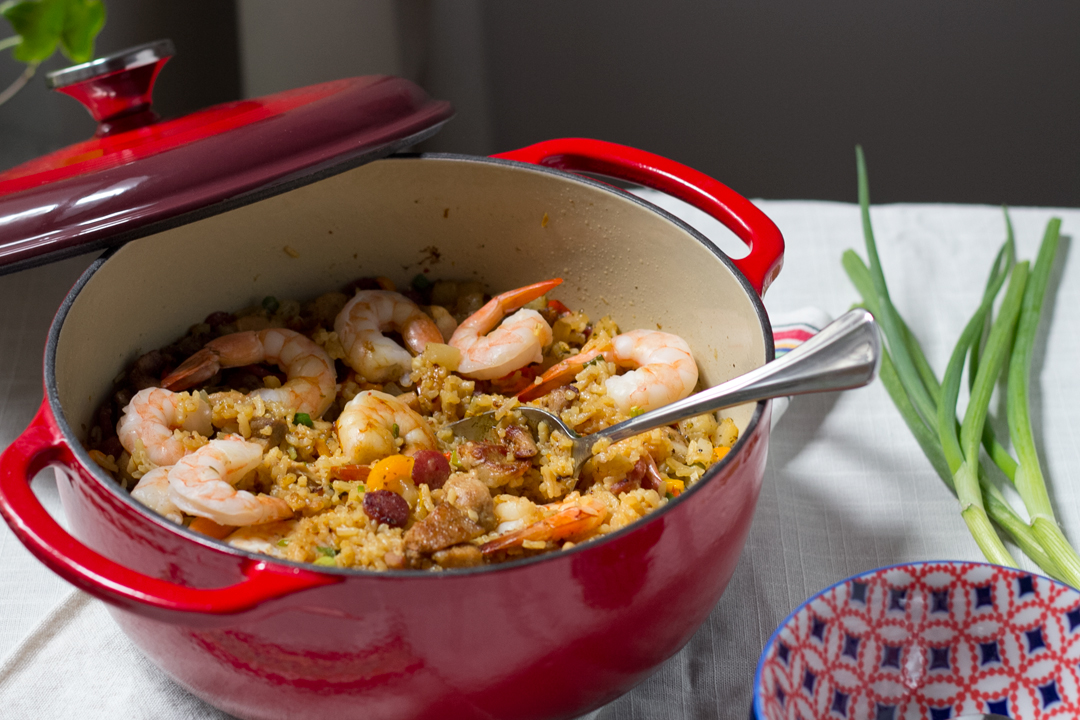
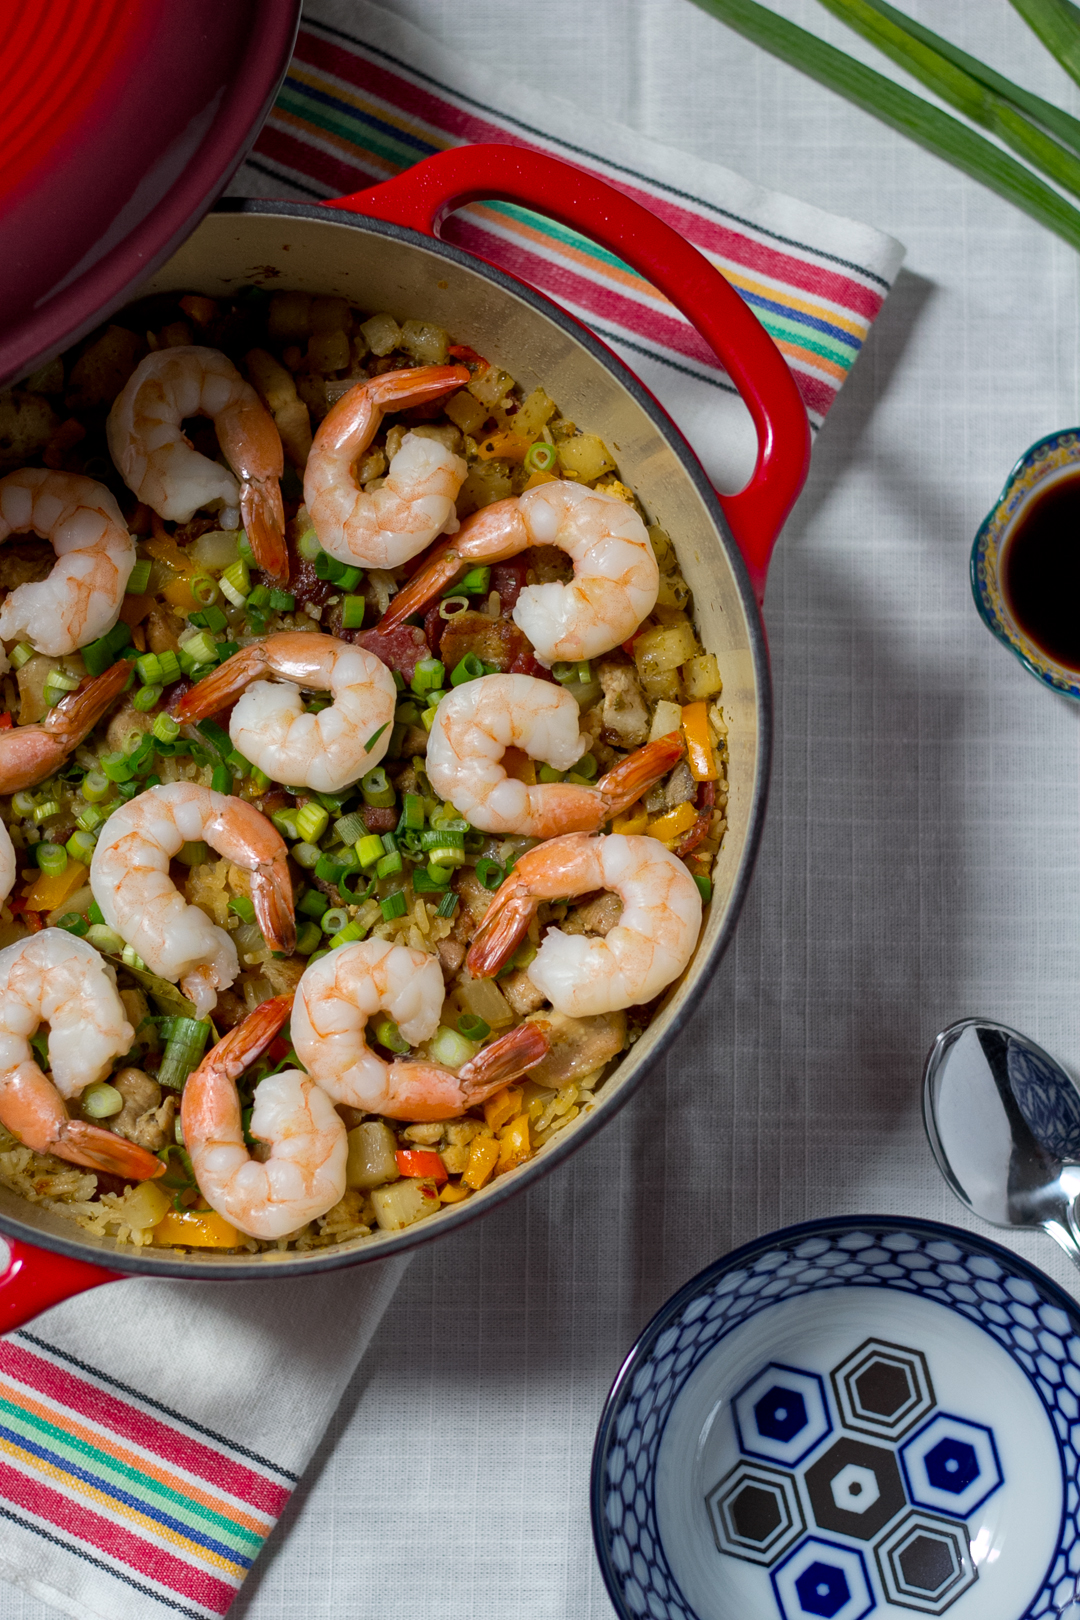
After giving both styles some thoughts, I chose to do a Cajun jambalaya over the Creole jambalaya. The Cajun culture and their history reminds me a lot of my Hakka roots. Cajun food is rustic country food that is generally very well seasoned which shares a lot of common ground with Hakka cuisine. Based on the typical Cajun jambalaya recipes, I switched out some things like onion and smoked sausage with Chinese turnip (lor bak) and Chinese sausage (lap Cheong). I also added five-spiced pork belly, fresh ginger, hoisin sauce, garlic chili sauce, and scallion to kick this Chinese-inspired jambalaya into high gear.

I was ecstatic with this Chinese-inspired Jambalaya that's totally comforting with a touch of my Chinese heritage.

Chinese-inspired Jambalaya

Prep time: 35 mins  Cook time: 35 mins  Total time: 1 hour 10 mins Serves: 5-6

Ingredients

  • 1/2 lb skinless and boneless chicken thighs
  • 1 tsp soy sauce
  • 1/8 tsp white pepper powder
  • 1/2 lb pork belly, skinless
  • 1/4 tsp five spice powder
  • 2oz Chinese sausage (lap cheong)
  • 1 tbsp minced garlic
  • 1 tsp minced ginger
  • 1 cup diced Chinese turnip (lor bak), about 1/2" dices
  • 1 cup diced bell peppers
  • 1 1/2 cups long grain white rice
  • 1 tbsp hoisin sauce
  • 2 tsp garlic chili sauce
  • 1 tsp dried thyme
  • 1 tsp oregano
  • 1 tsp garlic powder
  • 3 bay leaves
  • 3 cups chicken stock
  • 1/2 lb medium or large shrimp, shelled and deveined
  • 3 stalks chopped scallion
  • 2 tbsp lemon juice
  • 2 tbsp soy sauce

Instructions

  1. Slice pork belly diagonally into 1/4" thick slices. Marinate with five spice powder for 30 minutes.
  2. Cut chicken into 1/2" cubes. Marinate with soy sauce and white pepper powder.
  3. Slice Chinese sausage into 1/8" slices. Set aside.
  4. Mince garlic and ginger, and dice turnip into 1/2" cubes. And dice bell peppers.
  5. Place a Dutch oven over medium-high heat, drizzle about 2 tablespoons of oil, and twirl the pan a couple times to spread oil evenly. Add pork belly, stir several times until meat is browned and caramelized, about 3 minutes. Remove from pan. Add chicken, and cook until it's no longer pink on the outside, about 2. Remove from pan. Add Chinese sausage and let it cook for 2 minutes. Remove from pan.
  6. Turn the heat down to medium, stir in garlic and ginger, cook for 30 seconds. Add turnip and bell peppers, and let it cook for 3 minutes, stir frequently.
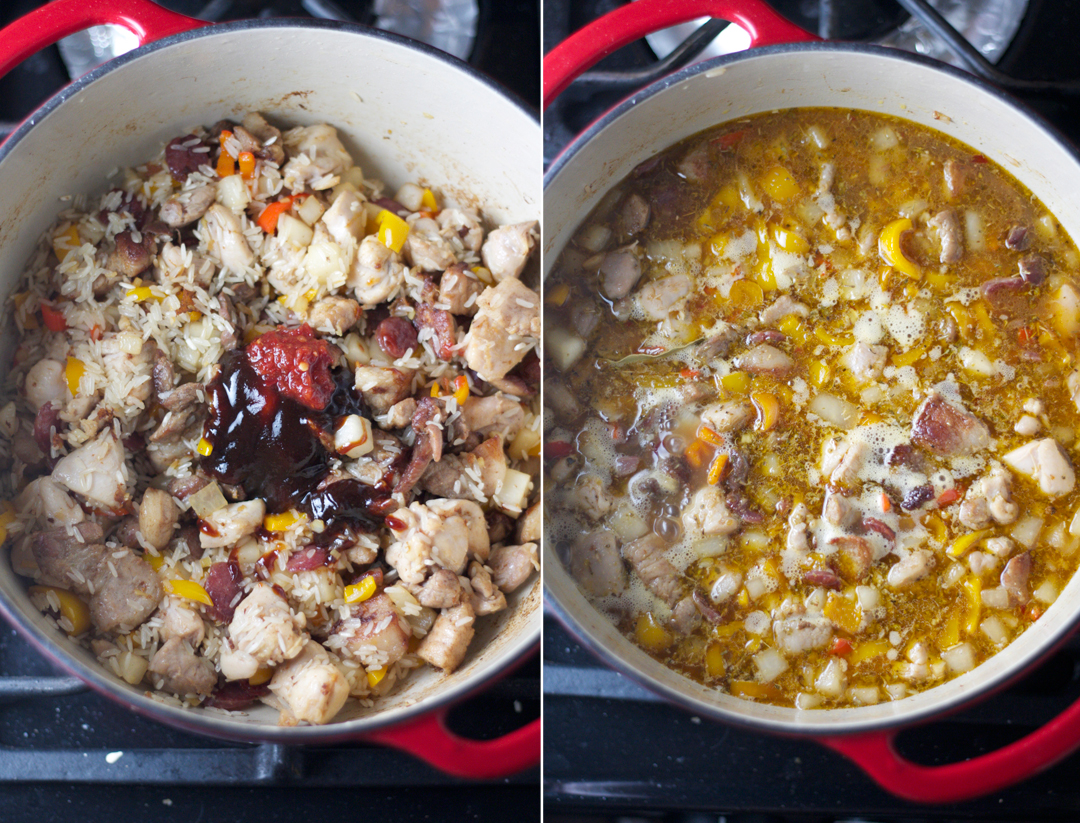
  7. Stir pork belly, chicken, and Chinese sausage back into the pot. Add rice and stir. Add hoisin sauce, garlic chili sauce, thyme, oregano, and garlic powder, and stir one more time until everything is mixed well together. Throw in the bay leaves, then add chicken stock. Give it a quick stir, and turn the heat up. Once it boils, return the heat to low, cover and let it cook for 15 minutes.
  8. Sprinkle chopped scallion, and lay the shrimp on top, then drizzle with the lemon juice. Cover and let it cook for another 5 minutes, until shrimp has turn completely pink.
  9. Drizzle 1 to 2 tablespoons of soy sauce, then serve hot.

Ketchup Sriracha Shrimp

I love shrimp. And I love shell-on shrimp even more! Seafood is extremely easy to find in Hong Kong as it is surrounded by water. Did you know that there're actually 260 outlaying islands in Hong Kong? Islands like Cheung Chau, Peng Chau, Lamma Island, and Lantau Island are the most populated amongst them all. There're tons of fishing villages and historic sites that tourists often miss out on when they visit the Kong. The four major outlaying islands are pretty easy to get to by ferry which you can board from Central on Hong Kong Island. Plus, there are ferries that would take you from island to island. Sometimes I feel like even locals themselves don't realize just how amazing these outlaying islands are! Going to the islands is always an adventure for people who don't actually live there. After all, Hong Kong is not always about the hustle and bustle, especially when outdoor adventures are easily accessible within an hour or less. I'm talking about hiking, swimming, surfing, going to the beach, taking boat trips, eating fresh seafood, visiting fishing villages and old temples, etc. I can really go on and on about all the fun outdoorsy stuff in the Kong (as lately I'm doing some homework and begin to think about what kind of day trips I'd like to go on when I head back to Hong Kong NEXT MONTH!)

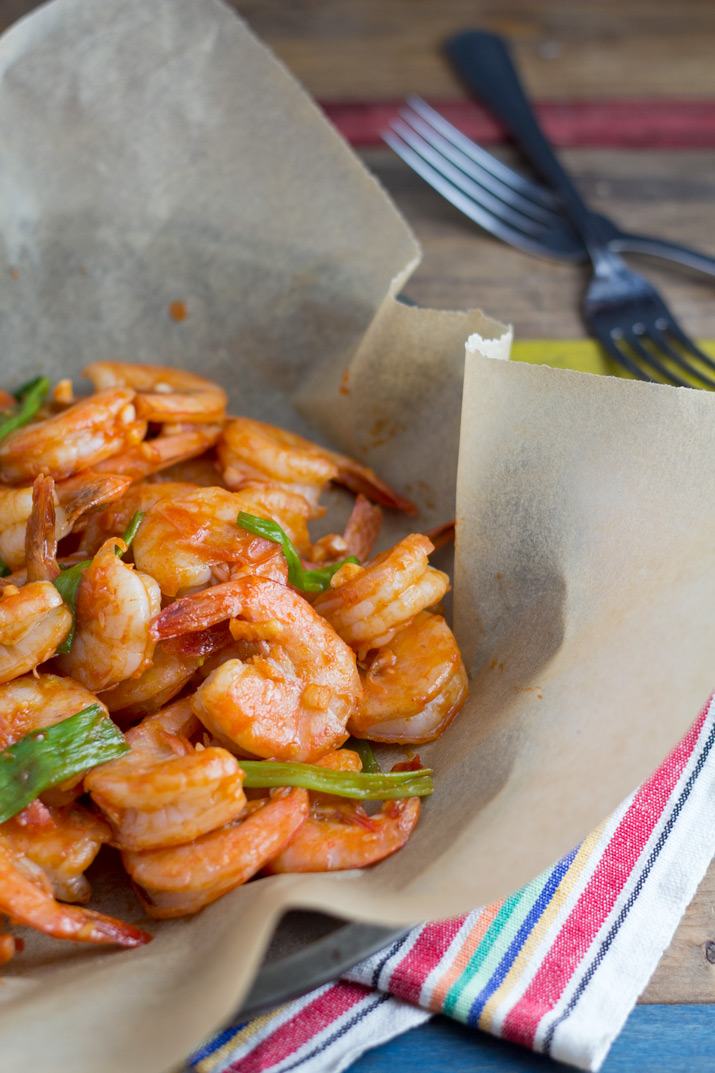
So, what brings me to this Ketchup Sriracha Shrimp? I think it's just the fact that it's another dish that reminds me of my mom's cooking. Her version, however, does not involve any sriracha or spiciness, just plain simple ketchup shrimp. But when I was putting this recipe together, adding sriracha just makes sense!

And you don't need a whole lot of sriracha either, 1/2 tablespoon is all you need to highlight the taste.

What else do you need other than ketchup to make this Ketchup Sriracha Shrimp? A tiny bit of rice vinegar, garlic, scallion, salt, and white pepper powder. My mom would often make her ketchup shrimp with whole shrimp, meaning with the heads and all. Fresh seafood, though, isn't always so easy find and widely available. I totally would have gone with fresh shrimp if it was easier and cheaper to get here! This time, I just settled on some good ol' frozen shrimp. Can you make this dish with shelled shrimp you may ask? You could... but I don't recommend it because it just won't give you the same flavor. Plus, how could you eat a Cantonese shellfish dish without the shells? It's like eating buffalo wings without bones. You just gotta stick with what's good here!

Tangy and sweet with a spicy kick. I just can't get enough of it!

Ketchup Sriracha Shrimp

Prep time: 10 mins  Cook time: 5 mins  Total time: 15 mins

Serves: 2

You'll need:

  • 1 lb frozen medium shrimp, shell-on and deveined
  • 2 stalks of scallion

Sauce:

  • 3 tbsp ketchup
  • 1/2 tbsp sriracha
  • 1 tsp rice vinegar
  • 1/4 tsp white pepper powder
  • 1 tsp salt
  • 1 tbsp minced garlic

Approach:

  1. Thaw frozen shrimp by running it under tap water for 5 minutes, in a colander. Give it a toss half way through to make sure it's getting thawed thoroughly. Then pat dry with paper towels.
  2. Chop scallion into 2" stalks, discard the white end parts. Then mix sauce ingredients together and set aside.
  3. Set a frying pan or skillet over medium-high heat, When the pan is hot, add some oil and twirl the pan to spread. Add shrimp to the pan. The shrimp should sizzle when it first come in contact with the pan. Saute the shrimp until it starts to turn pink on both sides. Cook until almost all the grey bits on the shrimp is gone but not totally, then add the sauce and scallion. Let it cook for another 20-30 seconds until the sauce has incorporated and shrimp has turn pink completely. It should take no more than 5 minutes to cook.
  4. Turn off the heat, plate, and serve hot.

Fried Shrimp Dumplings (炸蝦角)

There are three things I love and consider comfort food: noodles, dumplings, and wontons. Eat them separately? Eat them together? Egg noodle? Rice noodle? Pan-fried dumplings? Boiled dumplings? Soup dumplings? Eat them plain? Dip in soy sauce? Vinegar? Chili oil? I'm ALL IN. And most of the above is pretty easy to make at home. Then, it comes the fried dumplings that you may see at dim sum.

It's not that deep-frying is hard to do at home but it's just kind of a pain in the butt. Agree? But I decided to do it anyway because I was craving these little fried shrimp dumplings like there was no tomorrow. The trick in making restaurant-quality shrimp dishes is the shrimp. (DUH). Just what do Chinese restaurants do to make shrimp taste so good? The answer is in the texture which is written all over Chinese food. It's all about 口感 (mouth feel) - crunchy, soft, "springy" (彈牙), chewy, smooth, tender, etc... If you've had shrimp from a Chinese restaurant before, you'd notice that the shrimp tastes somehow "crunchier" in an interesting way. I was curious in just how such thing is accomplished so I started poking around for answers. Then, I stumbled upon a post written by Bee over at Rasa Malaysia. To sum up her research, treating shrimp and achieving a pH8 to pH9, which is considered alkaline, will make a crunchier texture. Cold tap water is usually alkaline with close to pH9. And that's why restaurants run cold water on shrimp. "Sea water is pH8 and the reason why live/raw shrimps have firm and crunchy flesh". Bee went further to test another method, that's used at some restaurants, of adding egg white (ph8), tapioca starch, and baking soda (ph8). It turned out to be a success, and it has been her go-to technique for preparing shrimp for stir-fries and whatnot. The only thing about this technique is that it requires 5-6 hours to marinate so plan ahead.

Gosh! Don't you love knowing food science? Or is it just me? Thanks Bee for sharing your findings.

Now, if you want the end product of the shrimp dish to have whole shrimps, then I'd suggest that you give Bee's technique a try. However, for these Fried Shrimp Dumplings (炸蝦角), I was looking for another texture that fried shrimp rolls (炸蝦卷) at dim sums offer. For that, it requires a shrimp paste that's commonly referred to as Ha Kaw (蝦膠) which describes a shrimp paste that's springy or stretchy. But what the heck? How do you do that? Just hold on a second and let me explain before you decide to bail on me! What you really need is to get your hands dirty by mixing the ingredients by hand. If you can do that, you can make Ha Kaw (蝦膠). Yea, sure. You may try using a hand/stand mixer instead but you'll miss out on the fun! Besides, your hands are mandatory in the last step so you might as well get them dirty now. After mixing the shrimp paste together (stirring in one direction continuously), form it into a ball shape. Take it with one hand, then smack it back into the bowl. Repeat that 10 times then it's ready to be used as filling.

For deep-frying, it's handy to have a cooking thermometer so you can keep track of the oil temperature. Something like this from Sur la Table would be ideal because it's got a clip that holds it securely to the pan during frying.

Like spring rolls at dim sum, these fried shrimp dumplings are commonly served with worcestershire sauce (but sometimes served with mayonnaise instead). It's definitely one of my favorite dim sum dishes of all time!

Fried Shrimp Dumplings

Prep time: 35 mins  Cook time: 20 mins  Total time: 55 mins

Serves: about 24

You'll need:

  • 1 lb medium raw shrimp, shelled and deveined
  • 2 egg whites
  • 2 tbsp olive oil
  • ½ tsp salt
  • ½ tsp white pepper powder
  • 1 tsp sesame oil
  • 30 round wonton wrappers
  • 2 cups vegetable oil for frying

Approach:

  1. After peeling and deveining the shrimp, raise it under cold water for a few minutes, then pat dry with paper towels.
  2. Using the blade of a chef knife, lay it flat and mash the shrimp one by one by putting force down. Then push it to the side of the chopping board. Once all the shrimp has been mashed, give it a few more chops to make sure the consistency is good. Place it all in a big mixing bowl.
  3. Add egg whites, olive oil, salt, white pepper powder, and sesame oil. Run your fingers clock or counter-clock wise until everything is well-blended together. Then form it into a ball shape. Take it with one hand, then smack it back into the bowl. Repeat that 10 times. Cover the mixing bowl with plastic wrap, refrigerate for one hour.
  4. Damp a paper towel and cover wonton wrappers when not in use, and place a small bowl of water at your work station.
  5. Spoon about 1 tbsp of filling onto the middle of the wonton wrapper. Dip your finger in water and run it on the outskirt of half of the wrapper. Pinch the middle point on top, and make pleats on both sides. The tighter you can wrap a dumpling the better.
  6. In a 5-6 quart sauce pan, heat vegetable oil to 350°F over medium-high heat. Carefully monitor your oil temperature. Fry no more than 4 dumplings at a time. Fry each side for about a minute and a half, until golden brown. Place cooked dumplings on a plate lined with paper towels.
  7. Serve fried shrimp dumplings with worcestershire or mayonnaise as dipping sauce.

Singapore-Style Rice Vermicelli (星洲炒米)

I don't just like this dish, I LOVE this dish. In a way, Singapore-Style Rice Vermicelli (星洲炒米) (Singapore rice noodles or Singapore Mei Fun) is part of the identity of Hong Kong cuisine. It's a dish that every Hong Konger is familiar with growing up along with other east-meets-west fusion fairs that you can find in a Cha Chaan Teng. Now, listen, you can't find this dish in Singapore. It's not that they don't eat stir-fried rice vermicelli there (they DO!), it's just not the same thing with the same taste. So why is Singapore-Style Rice Vermicelli (星洲炒米) called Singapore-style rice vermicelli then?

Well, let me take a step back real quick and mention that an authentic Singapore fried rice vermicelli is actually called fried bee hoon which does not include curry, nor it is spicy. Fried bee hoon can be considered as "street food" because it's served in a lot of cooked food centre or food hawkers in Singapore, and it's fast, cheap, and filling (and often eaten as breakfast). Learn how to make economical fried bee hoon from Whisk and Knife.

So... where did the curry come from in most of the Singapore-style rice vermicelli dishes outside of Singapore? I have not been able to find the true answer but many seem to think that the curried rice vermicelli dish was born in Hong Kong's Cha Chaan Tengs. And because it's cooked with curry and it's very similar to fried bee hoon, "Singapore Noodle" was created.

The kind of rice noodle used in Singapore-style rice vermicelli (星洲炒米) should be very thin so Mei Fun (米粉) is used often. I found the Wai Wai brand to be the best when cooking stir-fry noodles because the soaking time is short, and the texture is just right.

I was soaking three pieces of rice vermicelli but two are actually enough for this recipe. Remember to use warm water. I've cut them into halves so they can all be submerged. Plus, it's easier to stir-fry noodles that have been broken up. To save time, soak the dried noodles while you prep for the other ingredients which takes about 15-20 minutes.

Here I have everything cut up and ready to go! Stir-fry happens quickly so you don't want to get held up while things are already getting cooked in the wok. When I was at the store, I saw these small bell peppers so I used them instead of just a red bell pepper. Here I also have half of an yellow onion, 2 cooked and sliced eggs, some char siu, and some minced garlic and grated ginger. If you like to eat spicy, some hot pepper slices would be good, too.

And what can I say? :) I just can't get enough of Huy Fong's chili garlic sauce! It's just the perfect condiment for this singapore style rice vermicelli!

Singapore-Style Rice Vermicelli (星洲炒米)

Prep time: 15 mins  Cook time: 15 mins  Total time: 30 mins

Serves: 2

You'll need:

  • 2 pieces of Wai Wai brand dried rice vermicelli
  • 4 garlic cloves, minced
  • 1 tsp peeled and grated fresh ginger
  • 8-10 medium raw shrimp, shelled and deveined
  • 1/2 lb char siu, thinly sliced
  • 2 eggs, beaten, cooked, and sliced
  • 1 cup of red bell pepper, thinly sliced
  • 1/2 medium yellow onion, thinly sliced
  • a few slices of long hot green peppers

    Sauce:
  • 5 tbsp soy sauce
  • 2 tbsp cooking wine
  • 2 1/2 tsp curry powder
  • 1/2 tsp sugar
  • 1/2 tsp white pepper powder

Approach:

  1. Start by soaking the dried rice vermicelli in a large mixing bowl with some warm water while prepping for other ingredients. You may choose to cut them down in halves, in order for them to be fully submerged.
  2. Mix the sauce together and set aside.
  3. In medium-high heat, drizzle some oil in the pan or wok. Cook the shrimp for about 2 minutes each side then set aside.
  4. Drain the rice vermicelli. (For easier stirring while cooking it with all the other ingredients, you may choose to cut the noodle down roughly. I like it this way also because it’s easier to eat, shorter noodles make better “bite sizes”. But that’s just a completely personal taste.)
  5. Drizzle some oil in the pan/wok. Cook the garlic and ginger until fragrant, then add all the vegetables. Cook for 3-4 minutes until soften or until onion is transparent in color. Set aside.
  6. Drizzle some more oil in the pan/wok. Cook the rice vermicelli until it turns soft, about 3 minutes, then add the vegetable, shrimp, char siu, and eggs. Give it a big stir while adding the sauce. Let it cook for another few minutes until the sauce is all mixed in. Stir frequently.
  7. Serve immediately (with some garlic chili sauce on the side).

Notes:

If char siu isn’t available, try ham, bacon, or shredded pork.[br][br]Here’s a tip I picked up when cooking shrimp: straight shrimp are undercooked, shrimp that have just curled into a C-shape are perfectly cooked, and shrimp that have twisted into an O-shape are overcooked.